!pip install wandbIn this blog we will cover how to visualize metrics while training models, how to track the hyperparameters of our experiments, how to analyze our results using the W&B UI, and other problems W&B can help solve like hyperparameter tuning & model evaluation.
1. Introducing W&B
!pip install -r requirements.txtimport wandb
wandb.login() # then follow the link to get your API key and paste in box belowwandb: Logging into wandb.ai. (Learn how to deploy a W&B server locally: https://wandb.me/wandb-server)
wandb: You can find your API key in your browser here: https://wandb.ai/authorize
wandb: Paste an API key from your profile and hit enter, or press ctrl+c to quit: wandb: Appending key for api.wandb.ai to your netrc file: /home/stephen137/.netrc ········True!wandb --versionwandb, version 0.13.5A typical machine learning training script is included below for illustrative purposes :
def train(): # hard coded config values - not good practice
    'norm': 0.5, # normalization
    'batch_size': 2,
    'lr': 0.001, # learning rate
    'momentum': 0.9,
    'epochs': 2

    # setup training
    transforms = get_transforms(norm)
    data = get_data(transforms, batch_size)
    model = Net()
    criterion = nn.CrossEntropyLoss()
    optimizer = optim.SGD(model.parameters(), lr=lr, momentum=momentum) # SGD=stochastic gradient descent

    # train model
    for epoch in range(epochs):
        running_loss = 0.0 # track our metric
        for i, data in enumerate(data, 0):
            loss = update_model(batch, model, criterion, optimizer)

            # log results
            running_loss += loss # update metric
            if i % 2000 = 1999:
                print(f'[{epoch +1}, (i + 1:5d}] loss: {running_loss / 2000:.3f}') # using print to log is not good practice
                running_loss = 0.0
    path = './cifar_net.pth'
    save_model(model, path) # save the model locally

train()
After running the code with the specified parameters, and obtaining our predictions, and hopefully our metric, we will want to see if we can improve model performance by modifying the config, and iterating. It can quickly become difficult to track our experiment runs.
Weights and Biases was designed to tackle this specific problem.
2. Instrumenting W&B in your code
In this section we will demonstrate how to install and integrate the W&B Python client into our training script. We will learn how to refactor our code to create a run, gather configurations, and pass them to wandb.init(). Instead of printing metrics, we use wandb.log() to store and visualize the history of each metric throughout the training process. This integration takes us one step closer to achieving reproducible experiments.
Updated training script :
def train():
    config = {       # config added which can be easily re-configured for quick iteration
        'norm': 0.5, # normalization
        'batch_size': 2,
        'lr': 0.001, # learning rate
        'momentum': 0.9,
        'epochs': 2
    }

    # setup training
    with wandb.init(project='GPT-5', config=config): # trigger a run, pass in config
        config = wandb.config

        transforms = get_transforms(config.norm) # reference config
        data = get_data(transforms, config.batch_size) # reference config
        model = Net()
        criterion = nn.CrossEntropyLoss()
        optimizer = optim.SGD(model.parameters(), lr=config.lr, momentum=config.momentum) # SGD=stochastic gradient descent

        # train model
        for epoch in range(config.epochs):
            for i, batch in enumerate(data, 0):
                loss = update_model(batch, model, criterion, optimizer)

                # log results
                wandb.log({'epoch': epoch, 'loss': loss}) # log the epoch and metric in a dictionary
        path = './cifar_net.pth'
        save_model(model, path) # save the model locally

train()
3. Exploring the W&B workspace
In this section, we demonstrate how to run a training script integrated with Weights & Biases and navigate the W&B workspace to view real-time metrics, interact with plots, and access system metrics. We also highlight W&B’s ability to capture information that helps with reproducibility, such as the environment, user, machine, and command used. Finally, we introduce the project page, which allows for comparing multiple runs in one place.
import torch
import torchvision
import torchvision.transforms as transforms
import torch.nn as nn
import torch.nn.functional as F
import torch.optim as optim

class Net(nn.Module):
    def __init__(self):
        super().__init__()
        self.conv1 = nn.Conv2d(3, 6, 5)
        self.pool = nn.MaxPool2d(2, 2)
        self.conv2 = nn.Conv2d(6, 16, 5)
        self.fc1 = nn.Linear(16 * 5 * 5, 120)
        self.fc2 = nn.Linear(120, 84)
        self.fc3 = nn.Linear(84, 10)

    def forward(self, x):
        x = self.pool(F.relu(self.conv1(x)))
        x = self.pool(F.relu(self.conv2(x)))
        x = torch.flatten(x, 1)
        x = F.relu(self.fc1(x))
        x = F.relu(self.fc2(x))
        x = self.fc3(x)
        return x

def get_predictions(model, inputs, optimizer):
    optimizer.zero_grad()
    return model(inputs)

def update_model(data, model, criterion, optimizer):
    inputs, labels = data
    preds = get_predictions(model, inputs, optimizer)
    loss = criterion(preds, labels)
    loss.backward()
    optimizer.step()
    return loss.item()

def get_transforms(norm=0.5):
    return transforms.Compose([transforms.ToTensor(),
                               transforms.Normalize((norm, norm, norm), (norm, norm, norm))])

def get_data(transforms, batch_size=4):
    trainset = torchvision.datasets.CIFAR10(root='./data', train=True,
                                            download=True, transform=transforms)
    trainloader = torch.utils.data.DataLoader(trainset, batch_size=batch_size,
                                            shuffle=True, num_workers=2)
    return trainloader

def save_model(model, path):
    torch.save(model.state_dict(), path)
import wandb
wandb.login()TrueLet’s run the modified training script :
def train():
    config = {       # config added which can be easily re-configured for quick iteration
        'norm': 0.5, # normalization
        'batch_size': 2,
        'lr': 0.001, # learning rate
        'momentum': 0.9,
        'epochs': 2
    }

    # setup training # using `with` to harness Python's Context Managers feature - will end when all indented code executed
    with wandb.init(project='GPT-5', config=config): # trigger a run, pass in config
        config = wandb.config

        transforms = get_transforms(config.norm) # reference config
        data = get_data(transforms, config.batch_size) # reference config
        model = Net()
        criterion = nn.CrossEntropyLoss()
        optimizer = optim.SGD(model.parameters(), lr=config.lr, momentum=config.momentum) # SGD=stochastic gradient descent

        # train model
        for epoch in range(config.epochs):
            for i, batch in enumerate(data, 0):
                loss = update_model(batch, model, criterion, optimizer)

                # log results
                wandb.log({'epoch': epoch, 'loss': loss}) # log the epoch and metric in a dictionary
        path = './cifar_net.pth'
        save_model(model, path) # save the model locally

train()
wandb version 0.15.3 is available! To upgrade, please run:
$ pip install wandb --upgrade
Tracking run with wandb version 0.13.5
Run data is saved locally in
/home/stephen137/Blog/posts/Weights&Biases/wandb/run-20230530_094748-189o9r5v
Downloading https://www.cs.toronto.edu/~kriz/cifar-10-python.tar.gz to ./data/cifar-10-python.tar.gz
Extracting ./data/cifar-10-python.tar.gz to ./data
Waiting for W&B process to finish... (success).
Run history:
| epoch | ▁▁▁▁▁▁▁▁▁▁▁▁▁▁▁▁▁▁▁▁████████████████████ |
| loss | ▇▆▆▇▇▄▂▂▁▄▂▅▂▄▁▅▁▂▄▅▂▂▂▅▅▅▄▃▆▂▃▂▂▄▅▂▃▂█▆ |
Run summary:
| epoch | 1 |
| loss | 1.49223 |
Synced amber-oath-2: https://wandb.ai/stephen137/GPT-5/runs/189o9r5v
Synced 5 W&B file(s), 0 media file(s), 0 artifact file(s) and 0 other file(s)
Synced 5 W&B file(s), 0 media file(s), 0 artifact file(s) and 0 other file(s)
Find logs at:
./wandb/run-20230530_094748-189o9r5v/logs
!pip install wandb --upgradeRuns
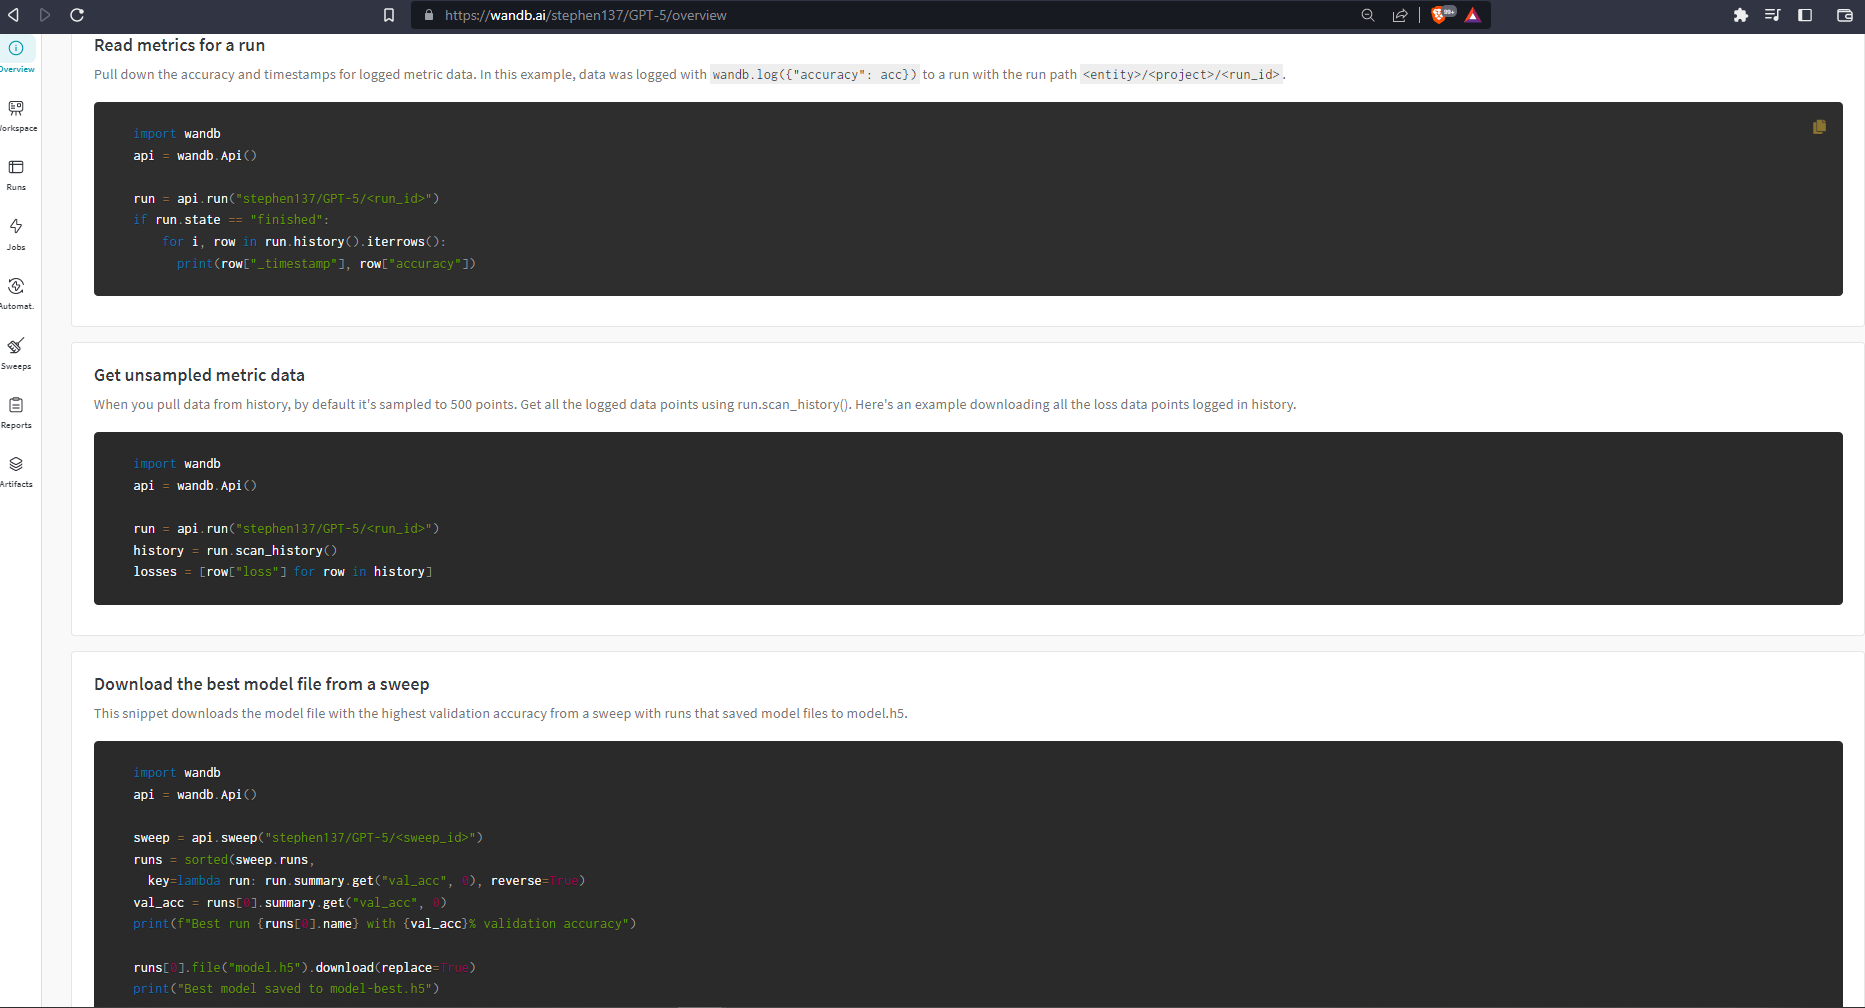
When we click on the link to our run https://wandb.ai/stephen137/GPT-5/runs/189o9r5v we are taken to Runs. There are six tabs on the left:
Overview 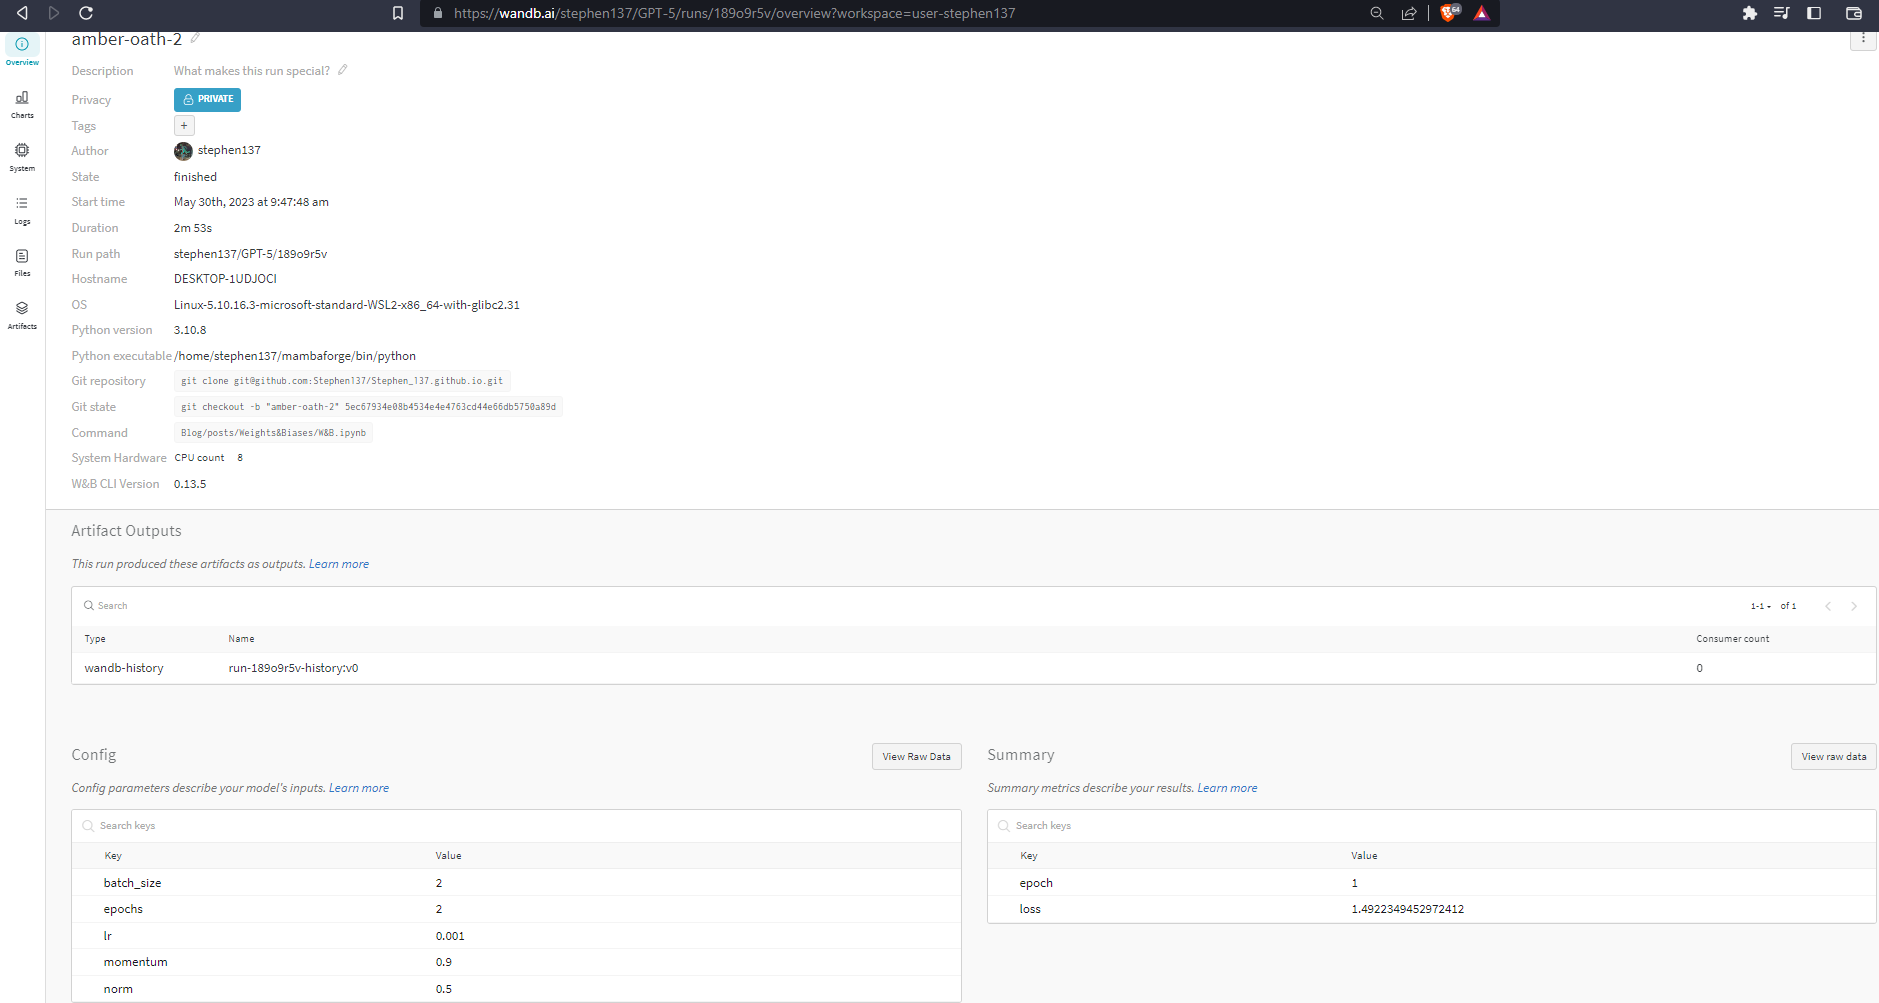
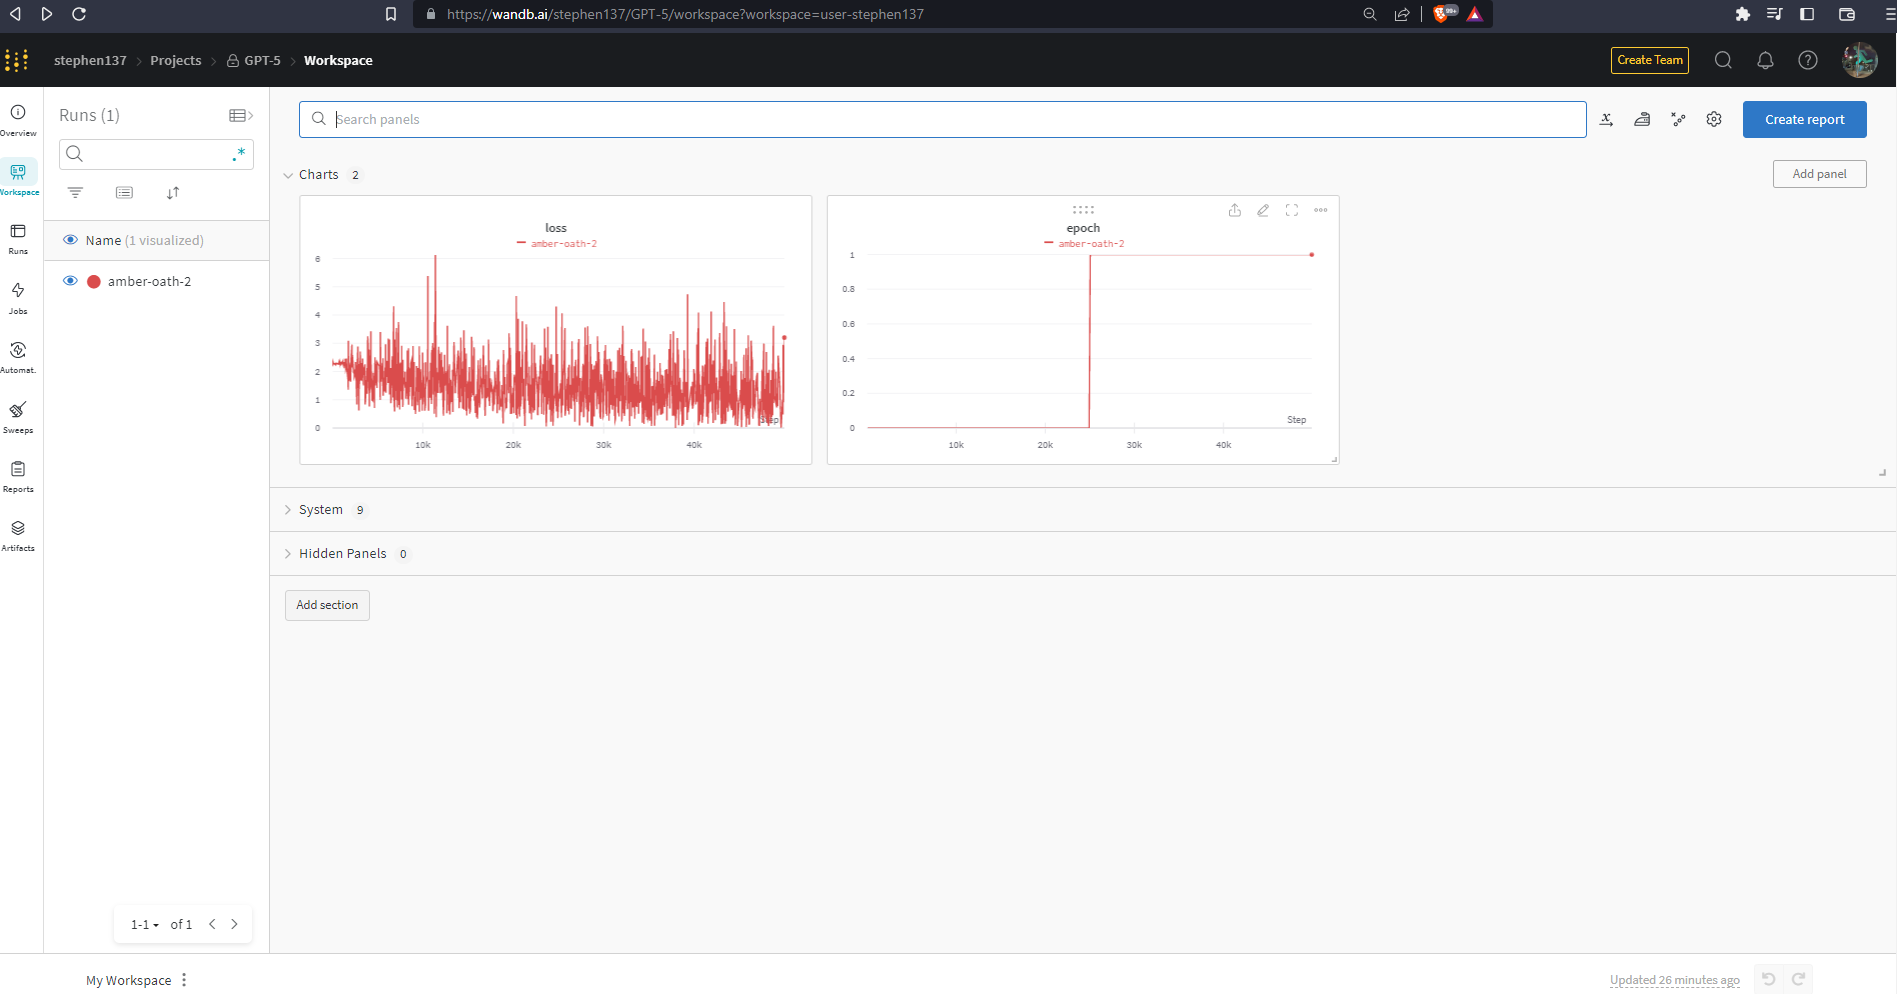
Charts 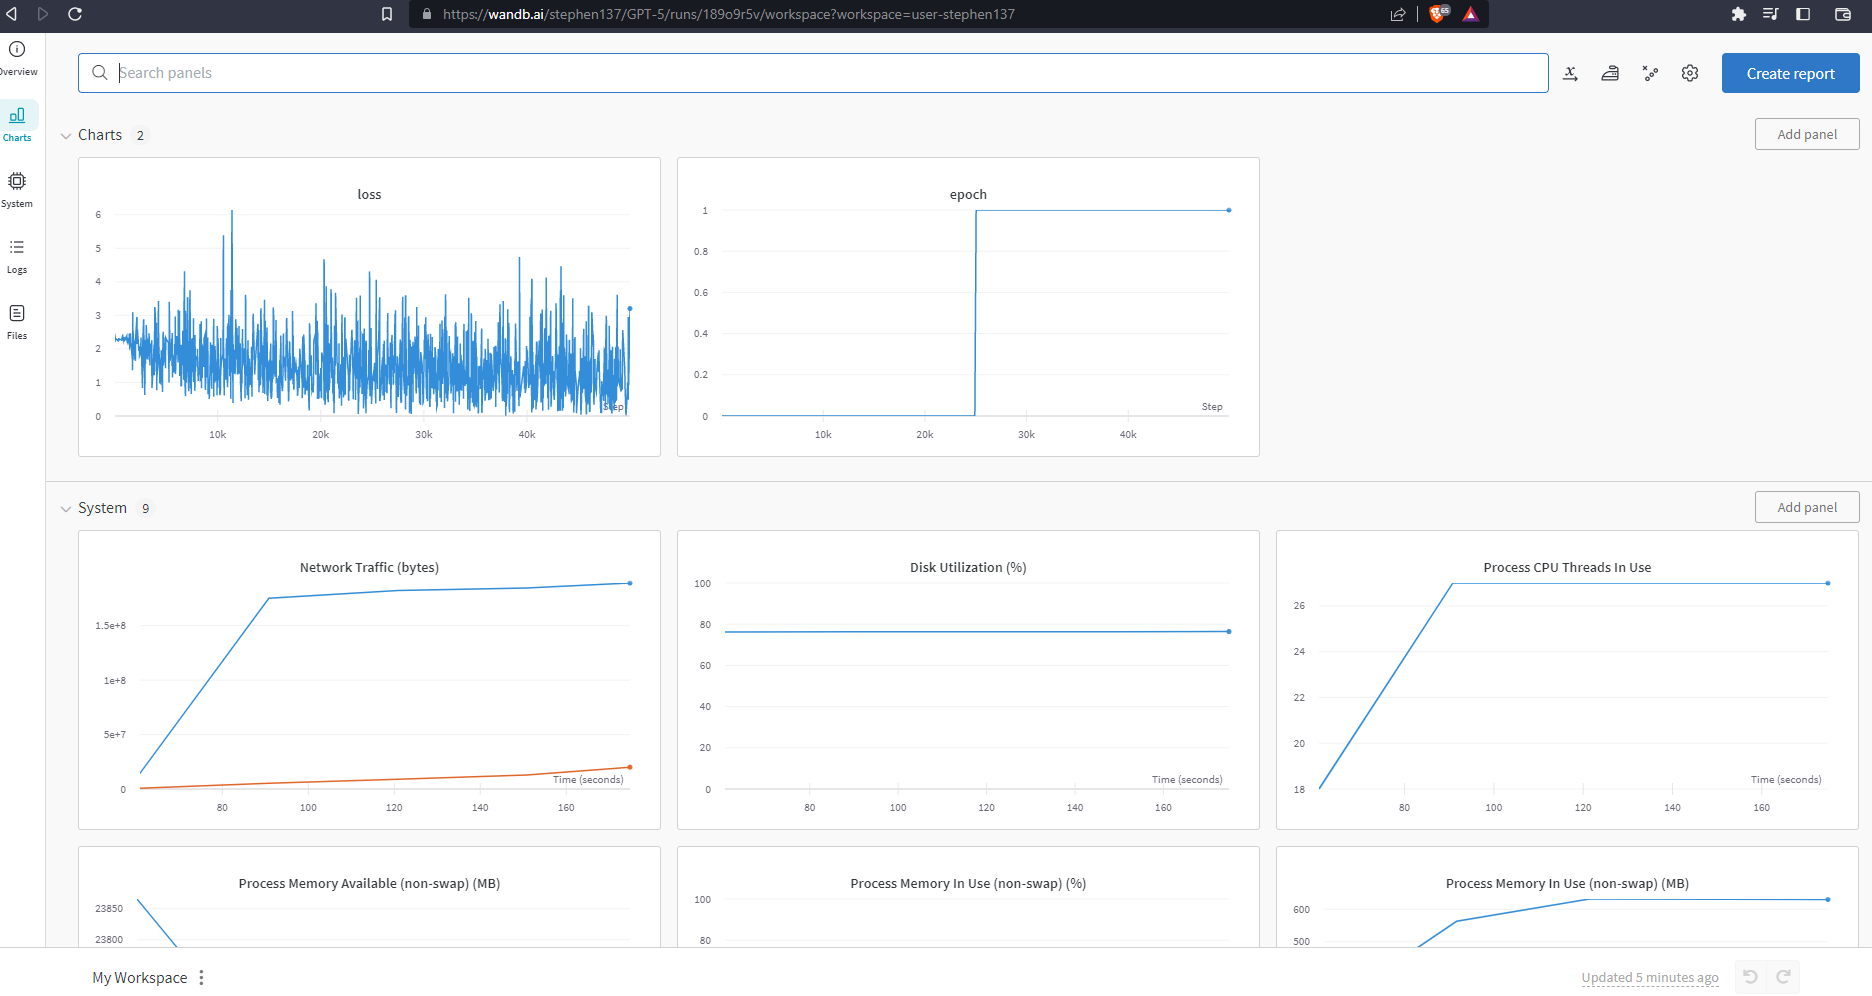
Lots of different visualizations are available.
System 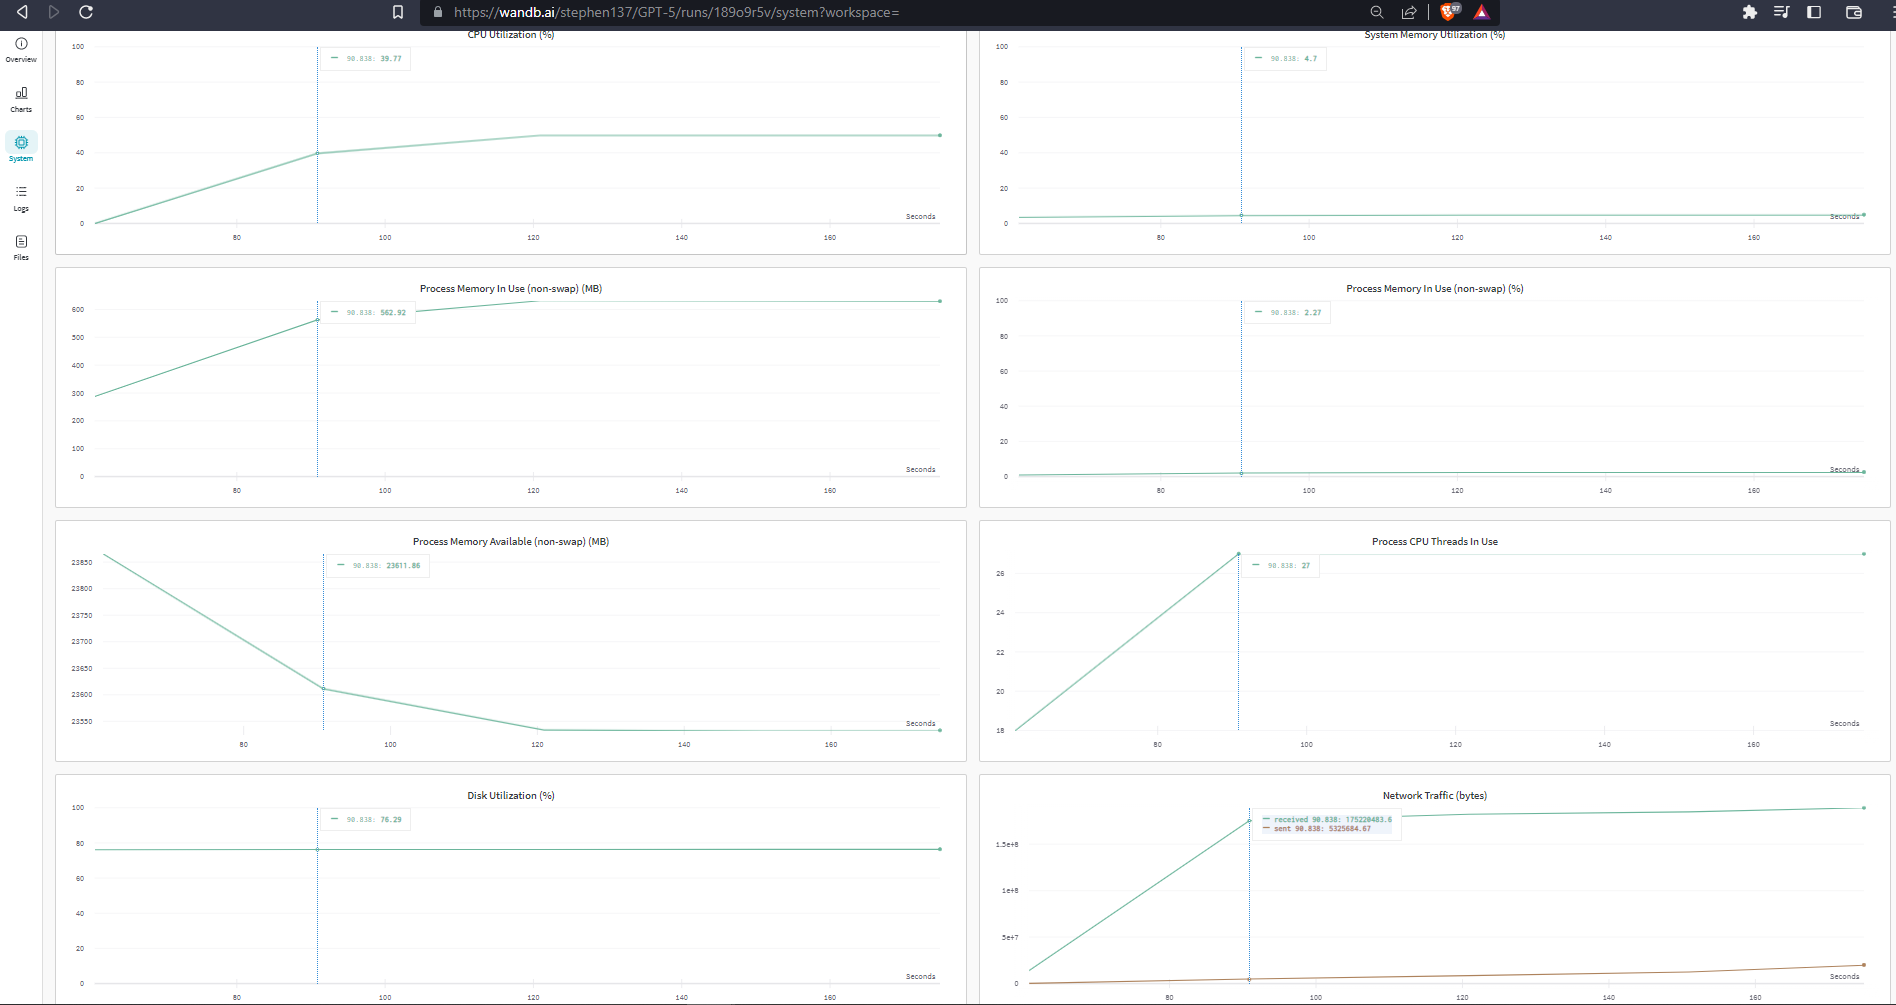
System metrics are captured automatically. These are useful for monitoring expensive compute.
Logs 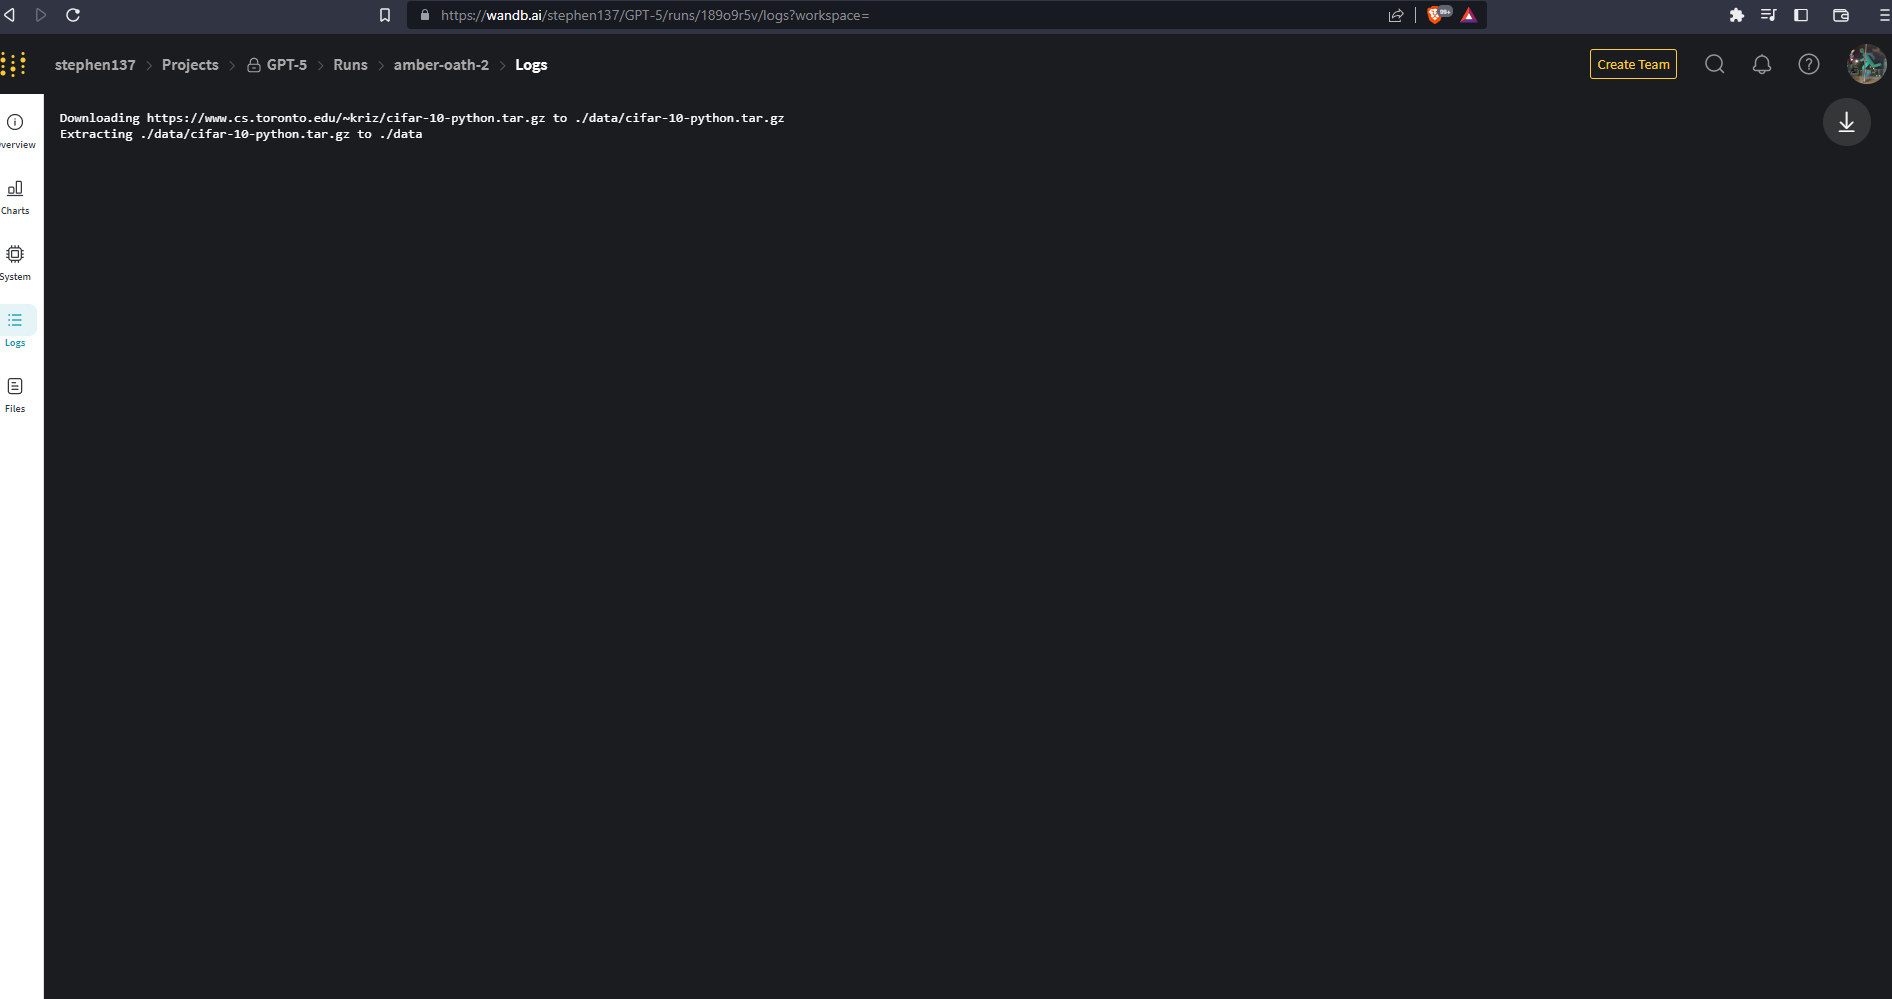
Files 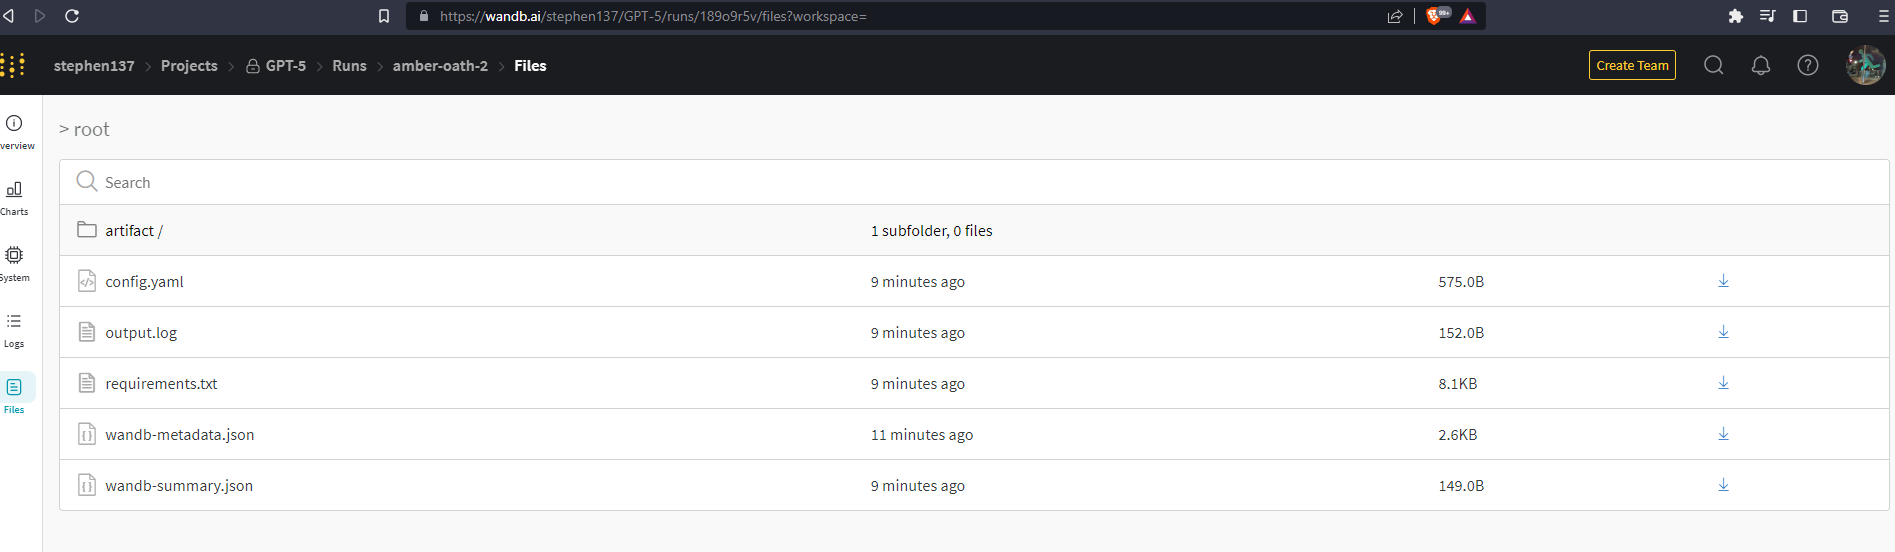
Artifacts 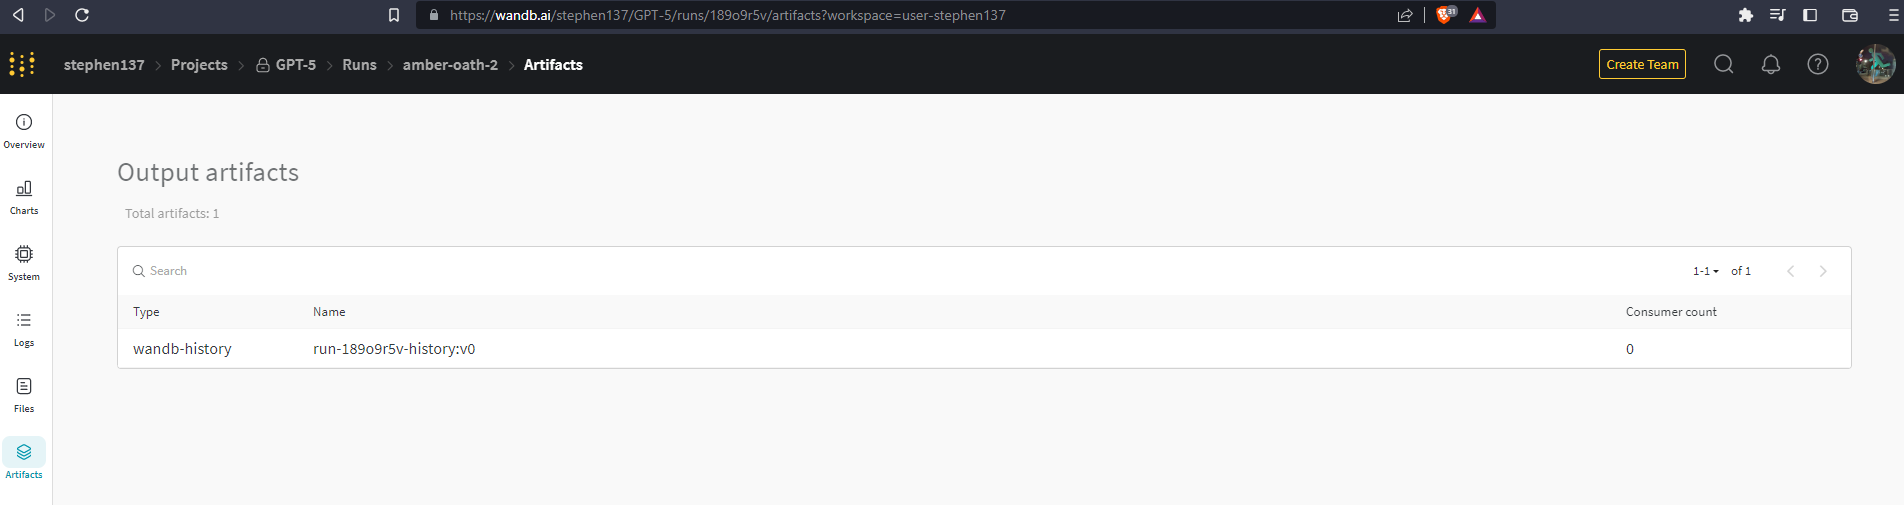
Exploring Projects
In the Projects section we have eight Tabs on the left :
Overview 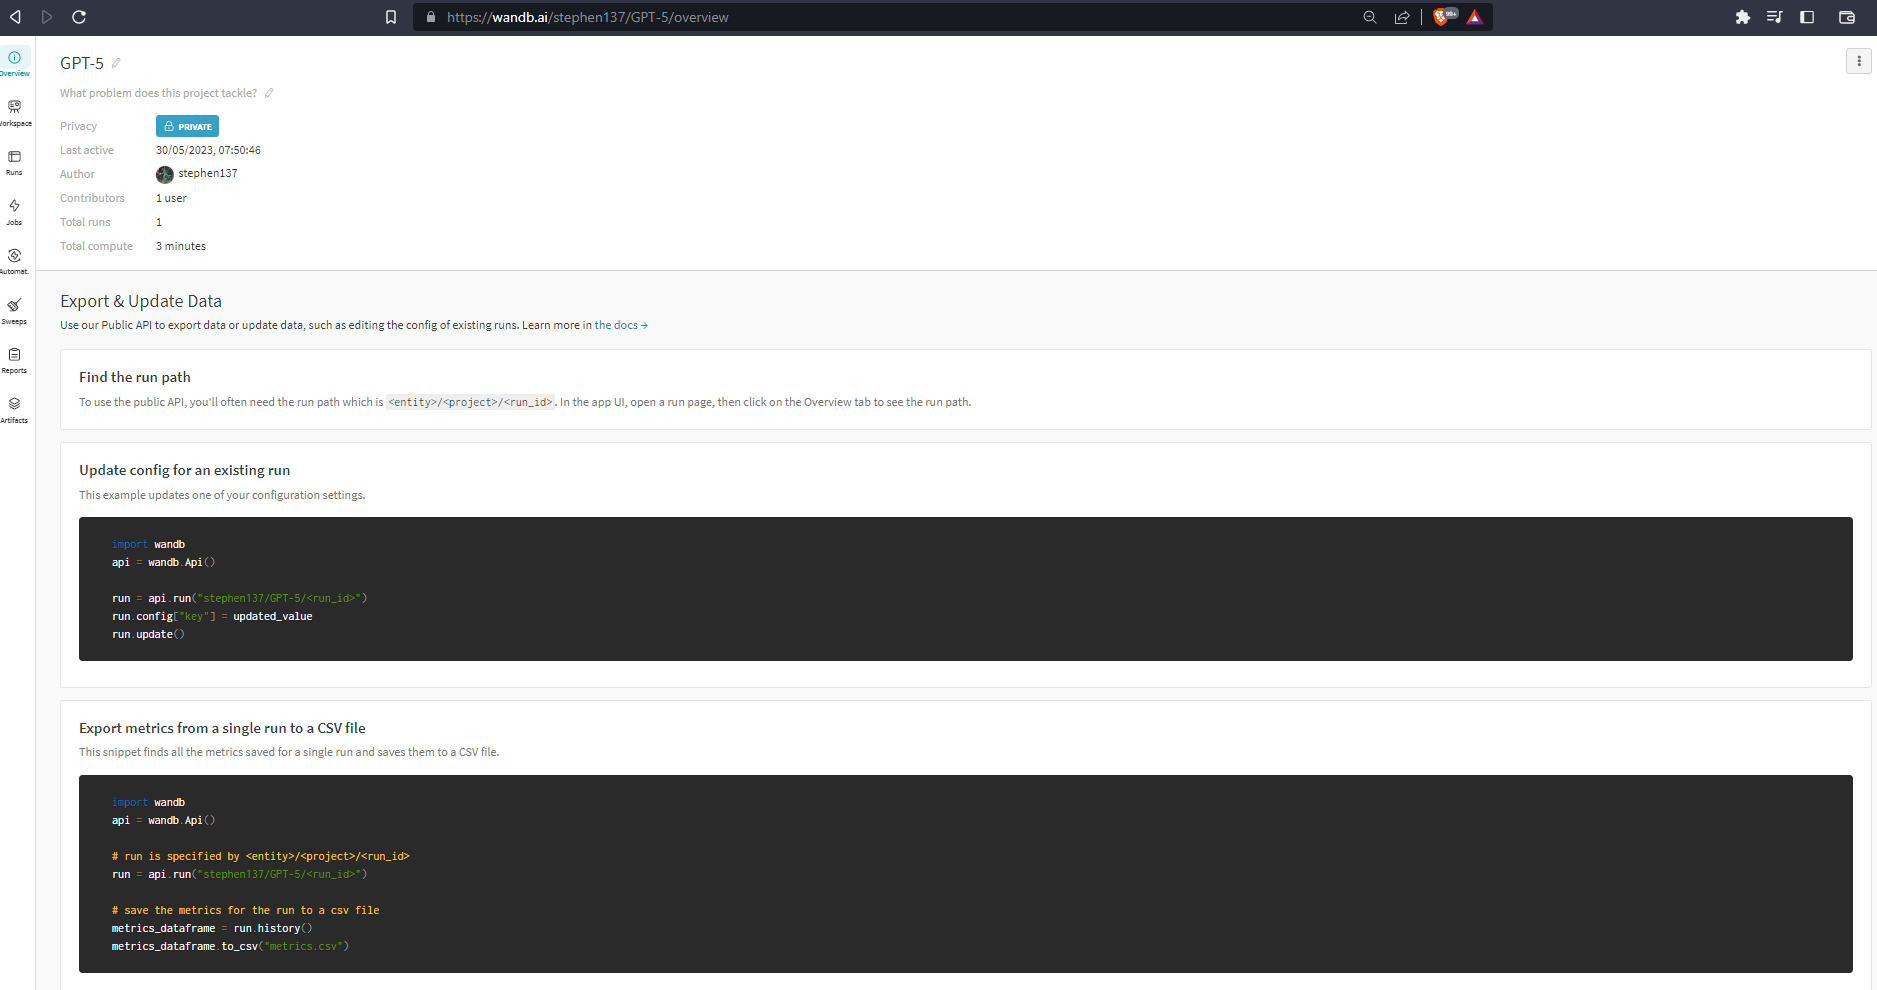
Workspace
Runs 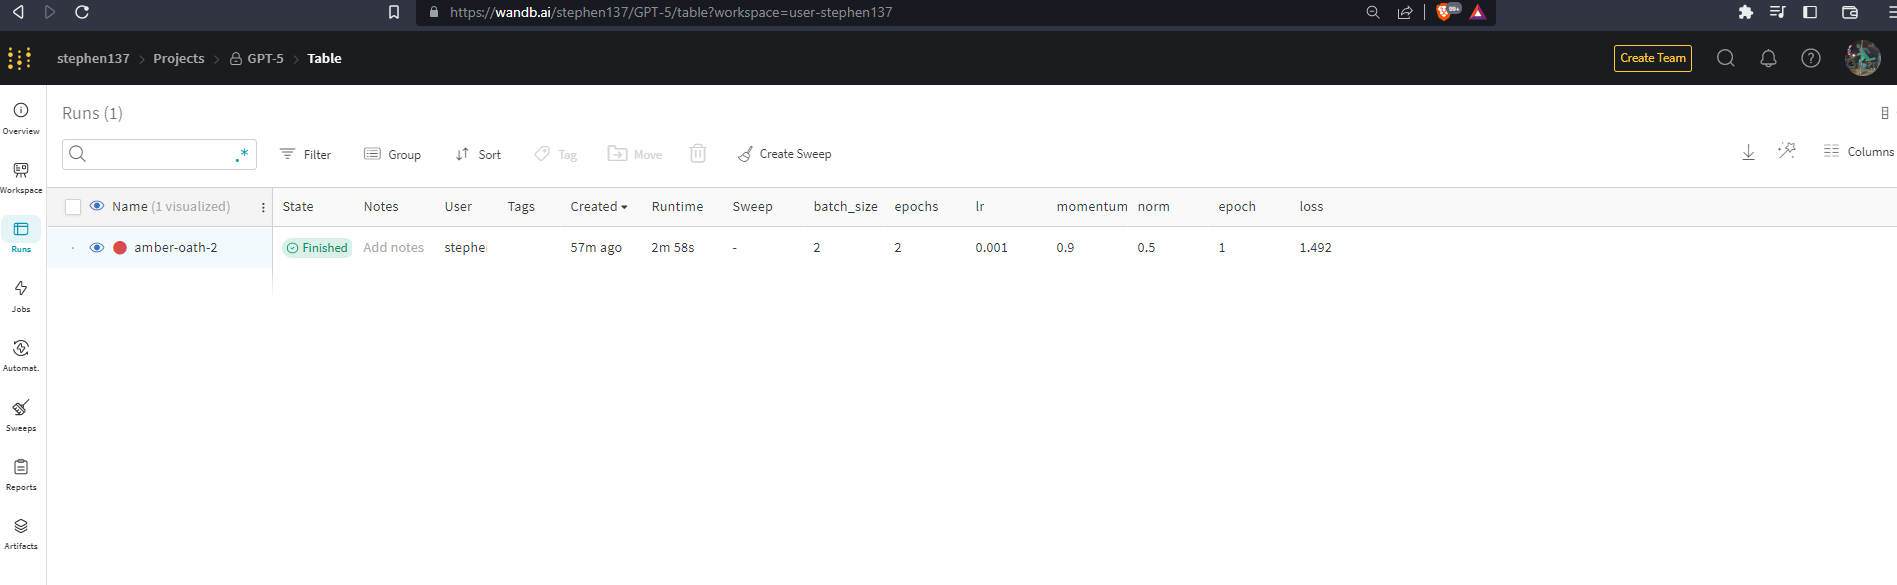
Jobs 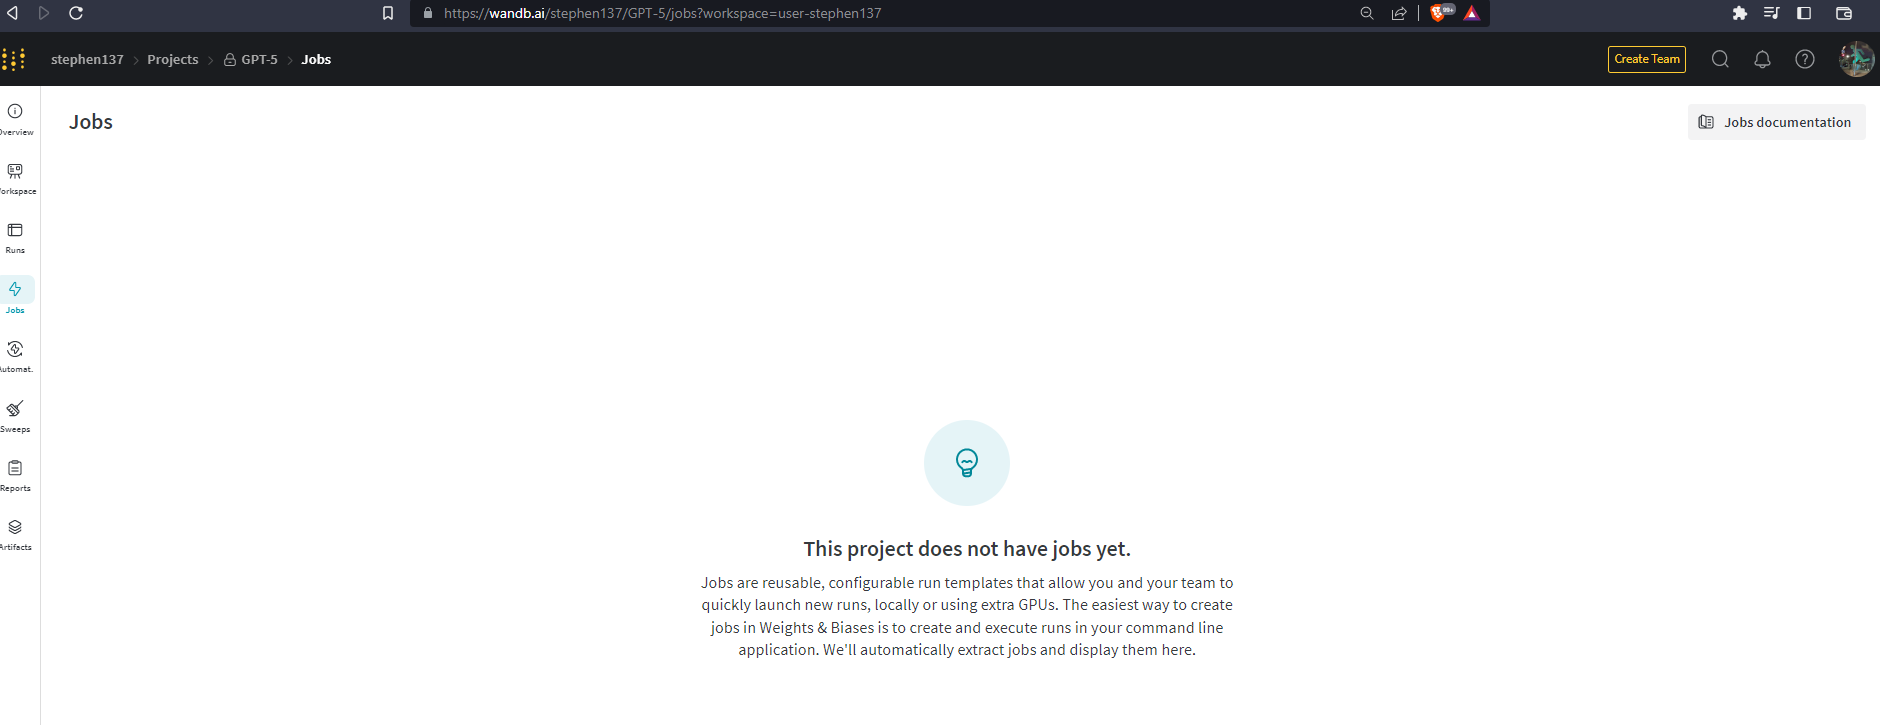
Automations 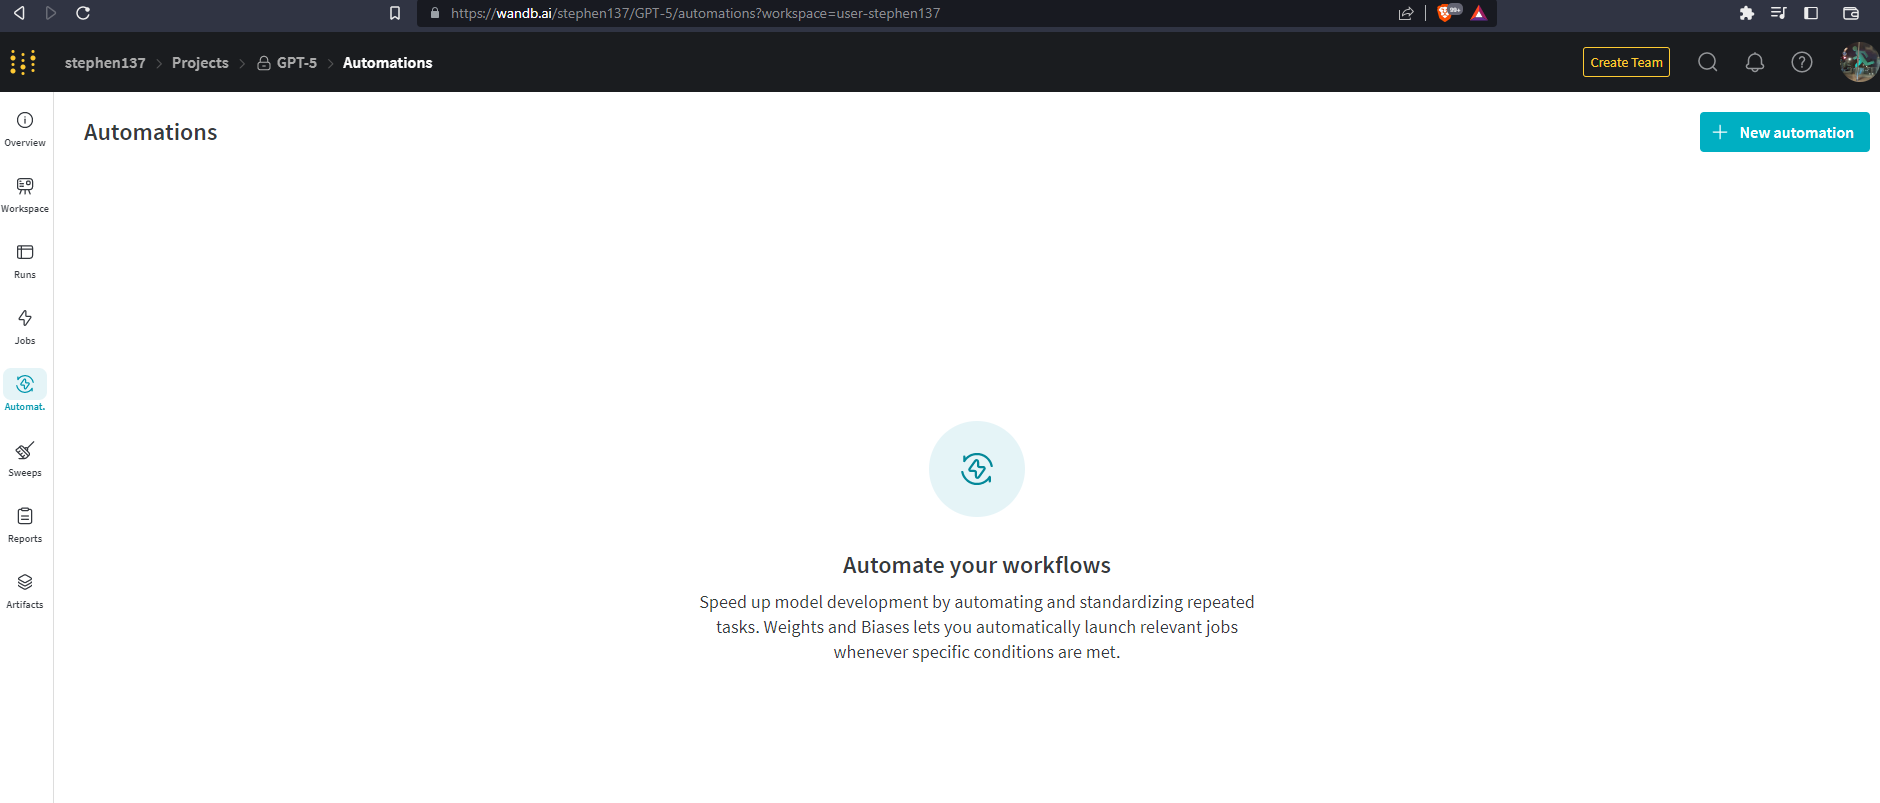
Reports 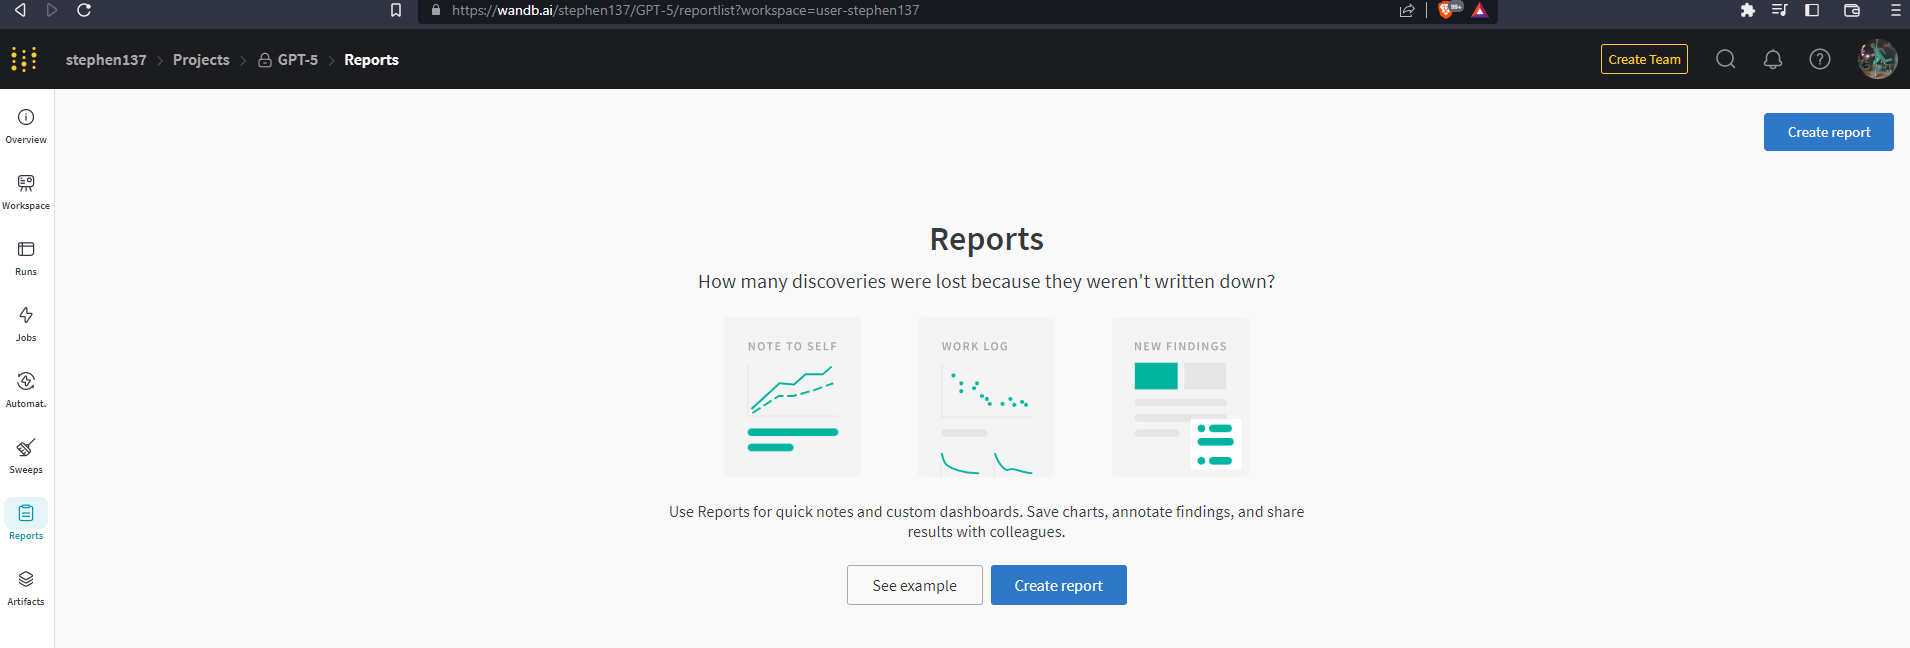
Artifacts 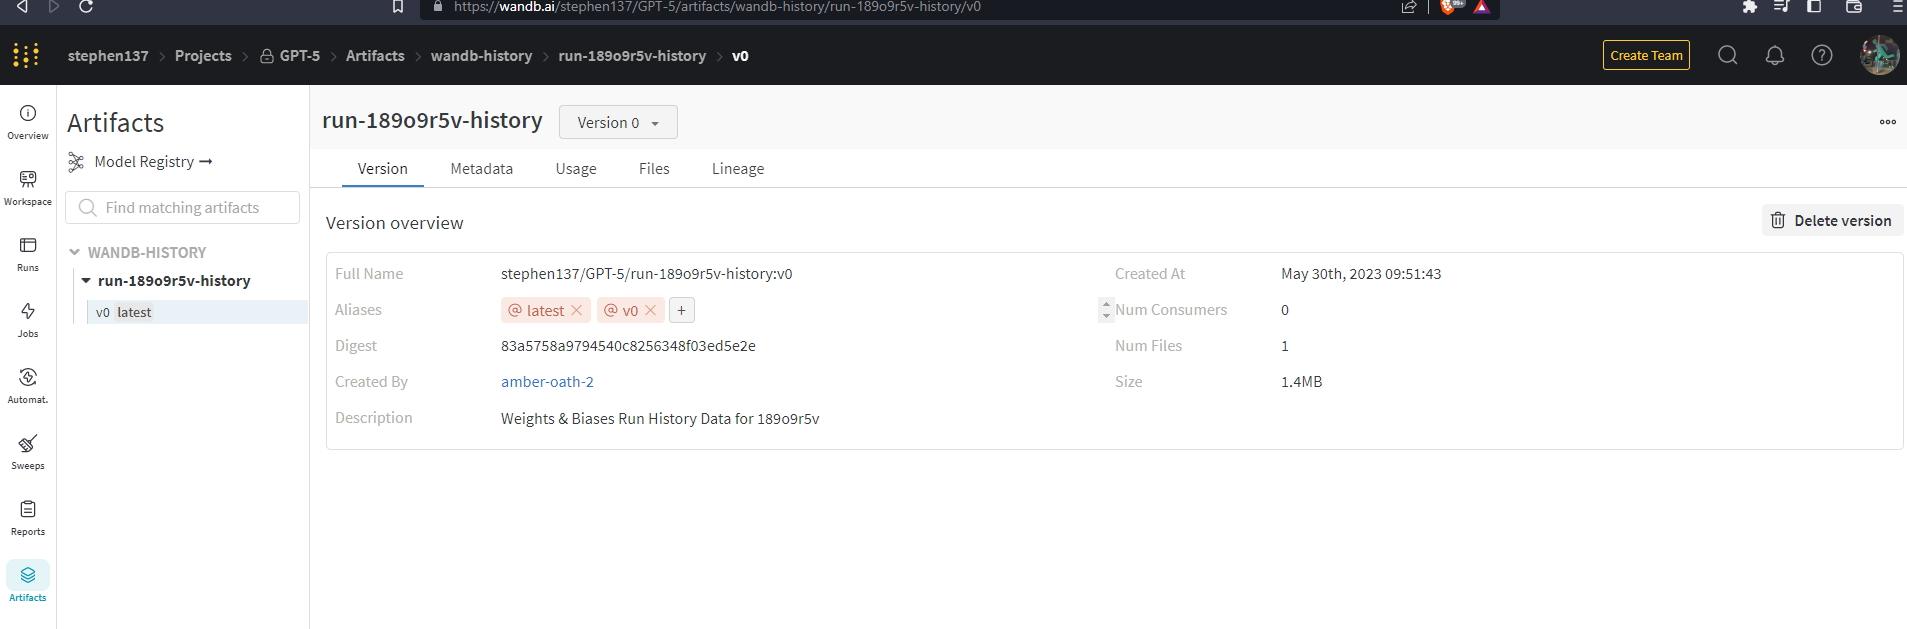
4. Comparing and analyzing experiments
In this section, we cover how to properly finish a W&B run in our code using wandb.finish() or a context manager. The section demonstrates how to view logged metrics in the workspace, interact with runs tables, and perform custom analysis to optimize models.
When running directly from within Jupyter NoteBooks we need to explicitly shut down a run by calling :
wandb.finish()When executing a script from the terminal, this happens automatically.
Ok. Let’s experiment by trying a few things that we think might improve our model. First log back in:
wandb.login()TrueExperiment 1
Let’s increase the batch size to 64
def train():
    config = {       # config added which can be easily re-configured for quick iteration
        'norm': 0.5, # normalization
        'batch_size': 64,
        'lr': 0.001, # learning rate
        'momentum': 0.9,
        'epochs': 2
    }

    # setup training # using `with` to harness Python's Context Managers feature - will end when all indented code executed
    with wandb.init(project='GPT-5', config=config): # trigger a run, pass in config
        config = wandb.config

        transforms = get_transforms(config.norm) # reference config
        data = get_data(transforms, config.batch_size) # reference config
        model = Net()
        criterion = nn.CrossEntropyLoss()
        optimizer = optim.SGD(model.parameters(), lr=config.lr, momentum=config.momentum) # SGD=stochastic gradient descent

        # train model
        for epoch in range(config.epochs):
            for i, batch in enumerate(data, 0):
                loss = update_model(batch, model, criterion, optimizer)

                # log results
                wandb.log({'epoch': epoch, 'loss': loss}) # log the epoch and metric in a dictionary
        path = './cifar_net.pth'
        save_model(model, path) # save the model locally

train()
wandb version 0.15.3 is available! To upgrade, please run:
$ pip install wandb --upgrade
Tracking run with wandb version 0.13.5
Run data is saved locally in
/home/stephen137/Blog/posts/Weights&Biases/wandb/run-20230530_112509-39xog2h5
Files already downloaded and verified
Waiting for W&B process to finish... (success).
Run history:
| epoch | ▁▁▁▁▁▁▁▁▁▁▁▁▁▁▁▁▁▁▁▁████████████████████ |
| loss | ██▇▇▇▇▇▇▇▇▇▇▇▇▇▇▇▇█▇▇▇▇▇▇▇▇▇▇▇▇▆▆▆▆▅▅▃▁▁ |
Run summary:
| epoch | 1 |
| loss | 1.95475 |
Synced dark-cosmos-4: https://wandb.ai/stephen137/GPT-5/runs/39xog2h5
Synced 5 W&B file(s), 0 media file(s), 0 artifact file(s) and 0 other file(s)
Synced 5 W&B file(s), 0 media file(s), 0 artifact file(s) and 0 other file(s)
Find logs at:
./wandb/run-20230530_112509-39xog2h5/logs
Experiment 2
Let’s increase the learning rate to 0.002
def train():
    config = {       # config added which can be easily re-configured for quick iteration
        'norm': 0.5, # normalization
        'batch_size': 2,
        'lr': 0.002, # learning rate
        'momentum': 0.9,
        'epochs': 2
    }

    # setup training # using `with` to harness Python's Context Managers feature - will end when all indented code executed
    with wandb.init(project='GPT-5', config=config): # trigger a run, pass in config
        config = wandb.config

        transforms = get_transforms(config.norm) # reference config
        data = get_data(transforms, config.batch_size) # reference config
        model = Net()
        criterion = nn.CrossEntropyLoss()
        optimizer = optim.SGD(model.parameters(), lr=config.lr, momentum=config.momentum) # SGD=stochastic gradient descent

        # train model
        for epoch in range(config.epochs):
            for i, batch in enumerate(data, 0):
                loss = update_model(batch, model, criterion, optimizer)

                # log results
                wandb.log({'epoch': epoch, 'loss': loss}) # log the epoch and metric in a dictionary
        path = './cifar_net.pth'
        save_model(model, path) # save the model locally

train()
wandb version 0.15.3 is available! To upgrade, please run:
$ pip install wandb --upgrade
Tracking run with wandb version 0.13.5
Run data is saved locally in
/home/stephen137/Blog/posts/Weights&Biases/wandb/run-20230530_112530-2zlb42ca
Files already downloaded and verified
Waiting for W&B process to finish... (success).
Run history:
| epoch | ▁▁▁▁▁▁▁▁▁▁▁▁▁▁▁▁▁▁▁▁████████████████████ |
| loss | ▄▄▄▇▄▃▃▄▃▃▂▄▃▂█▄▂▂▃▄▂▂▂▂▃▄▃▁▅▅▂▁▄▂▃▂▄▄▃▂ |
Run summary:
| epoch | 1 |
| loss | 1.1803 |
Synced happy-smoke-5: https://wandb.ai/stephen137/GPT-5/runs/2zlb42ca
Synced 5 W&B file(s), 0 media file(s), 0 artifact file(s) and 0 other file(s)
Synced 5 W&B file(s), 0 media file(s), 0 artifact file(s) and 0 other file(s)
Find logs at:
./wandb/run-20230530_112530-2zlb42ca/logs
Experiment 3
Let’s increase the number of epochs to 10
def train():
    config = {       # config added which can be easily re-configured for quick iteration
        'norm': 0.5, # normalization
        'batch_size': 2,
        'lr': 0.001, # learning rate
        'momentum': 0.9,
        'epochs': 10
    }

    # setup training # using `with` to harness Python's Context Managers feature - will end when all indented code executed
    with wandb.init(project='GPT-5', config=config): # trigger a run, pass in config
        config = wandb.config

        transforms = get_transforms(config.norm) # reference config
        data = get_data(transforms, config.batch_size) # reference config
        model = Net()
        criterion = nn.CrossEntropyLoss()
        optimizer = optim.SGD(model.parameters(), lr=config.lr, momentum=config.momentum) # SGD=stochastic gradient descent

        # train model
        for epoch in range(config.epochs):
            for i, batch in enumerate(data, 0):
                loss = update_model(batch, model, criterion, optimizer)

                # log results
                wandb.log({'epoch': epoch, 'loss': loss}) # log the epoch and metric in a dictionary
        path = './cifar_net.pth'
        save_model(model, path) # save the model locally

train()
wandb version 0.15.3 is available! To upgrade, please run:
$ pip install wandb --upgrade
Tracking run with wandb version 0.13.5
Run data is saved locally in
/home/stephen137/Blog/posts/Weights&Biases/wandb/run-20230530_112805-zuc3u1re
Files already downloaded and verified
Waiting for W&B process to finish... (success).
Run history:
| epoch | ▁▁▁▁▂▂▂▂▃▃▃▃▃▃▃▃▄▄▄▄▅▅▅▅▆▆▆▆▆▆▆▆▇▇▇▇████ |
| loss | ▅▃▅▃▃▄▁▂▅▁▃▃▃▆▂▂▂▆█▂▁▂▂▄▂▃▂▄▂▂▂▅▆▂▅▁▂▃▁▁ |
Run summary:
| epoch | 9 |
| loss | 1.09521 |
Synced azure-hill-6: https://wandb.ai/stephen137/GPT-5/runs/zuc3u1re
Synced 5 W&B file(s), 0 media file(s), 0 artifact file(s) and 0 other file(s)
Synced 5 W&B file(s), 0 media file(s), 0 artifact file(s) and 0 other file(s)
Find logs at:
./wandb/run-20230530_112805-zuc3u1re/logs
Experiment 4
Let’s combine Experiments 1 to 3, and increase the batch size to 64, the learning rate to 0.002, and the number of epochs to 10 :
def train():
    config = {       # config added which can be easily re-configured for quick iteration
        'norm': 0.5, # normalization
        'batch_size': 64,
        'lr': 0.002, # learning rate
        'momentum': 0.9,
        'epochs': 10
    }

    # setup training # using `with` to harness Python's Context Managers feature - will end when all indented code executed
    with wandb.init(project='GPT-5', config=config): # trigger a run, pass in config
        config = wandb.config

        transforms = get_transforms(config.norm) # reference config
        data = get_data(transforms, config.batch_size) # reference config
        model = Net()
        criterion = nn.CrossEntropyLoss()
        optimizer = optim.SGD(model.parameters(), lr=config.lr, momentum=config.momentum) # SGD=stochastic gradient descent

        # train model
        for epoch in range(config.epochs):
            for i, batch in enumerate(data, 0):
                loss = update_model(batch, model, criterion, optimizer)

                # log results
                wandb.log({'epoch': epoch, 'loss': loss}) # log the epoch and metric in a dictionary
        path = './cifar_net.pth'
        save_model(model, path) # save the model locally

train()
wandb version 0.15.3 is available! To upgrade, please run:
$ pip install wandb --upgrade
Tracking run with wandb version 0.13.5
Run data is saved locally in
/home/stephen137/Blog/posts/Weights&Biases/wandb/run-20230530_114029-1qwihr22
Files already downloaded and verified
Waiting for W&B process to finish... (success).
Run history:
| epoch | ▁▁▁▁▂▂▂▂▃▃▃▃▃▃▃▃▄▄▄▄▅▅▅▅▆▆▆▆▆▆▆▆▇▇▇▇████ |
| loss | ████▇▆▆▅▅▄▄▅▃▃▄▄▃▃▃▂▃▃▄▃▃▃▃▂▁▂▂▄▂▃▂▃▁▁▂▂ |
Run summary:
| epoch | 9 |
| loss | 0.74686 |
Synced twilight-snowball-7: https://wandb.ai/stephen137/GPT-5/runs/1qwihr22
Synced 5 W&B file(s), 0 media file(s), 0 artifact file(s) and 0 other file(s)
Synced 5 W&B file(s), 0 media file(s), 0 artifact file(s) and 0 other file(s)
Find logs at:
./wandb/run-20230530_114029-1qwihr22/logs
Let’s now visit the W&B UI to compare the results of our experiments. First let’s look at the Table view. The deafult is to list from newest to oldest run :
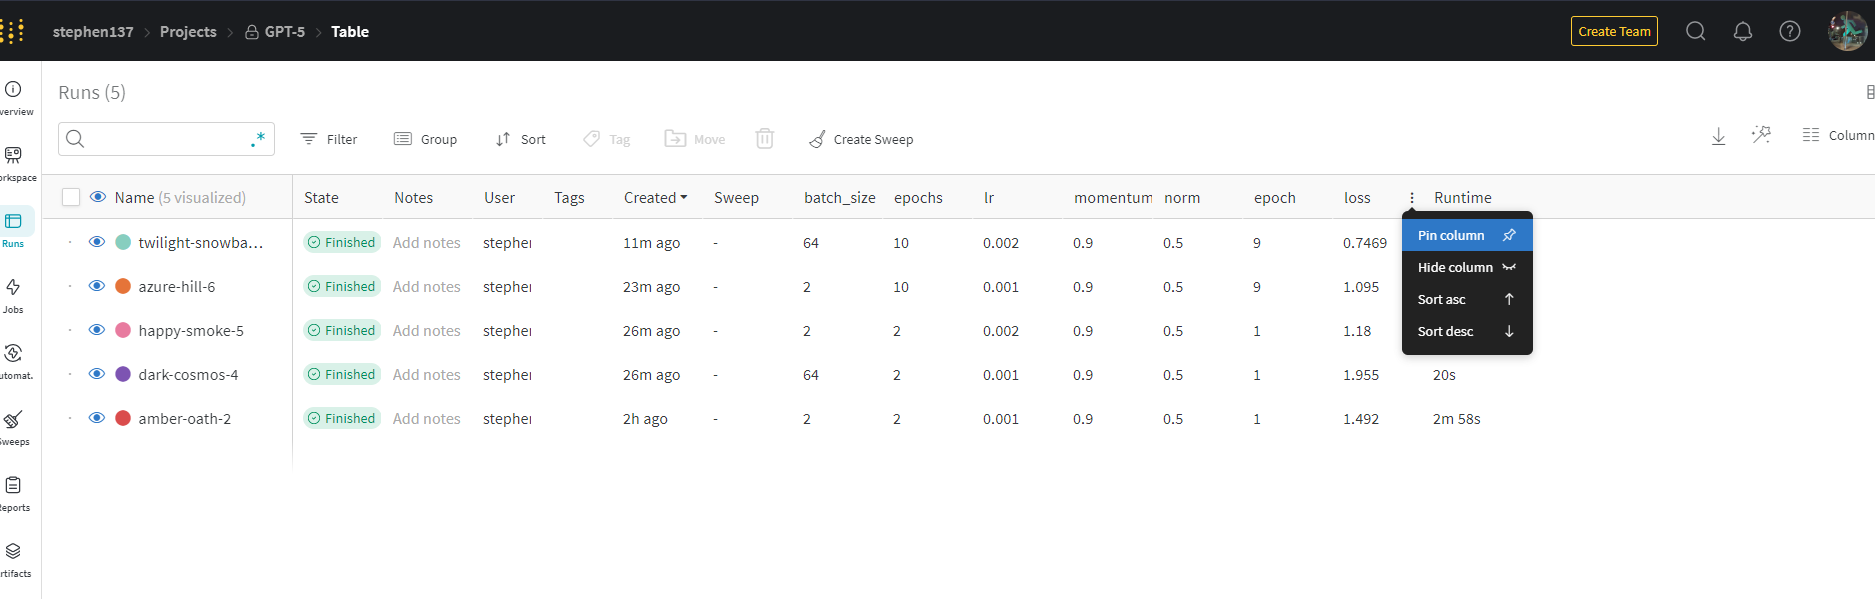
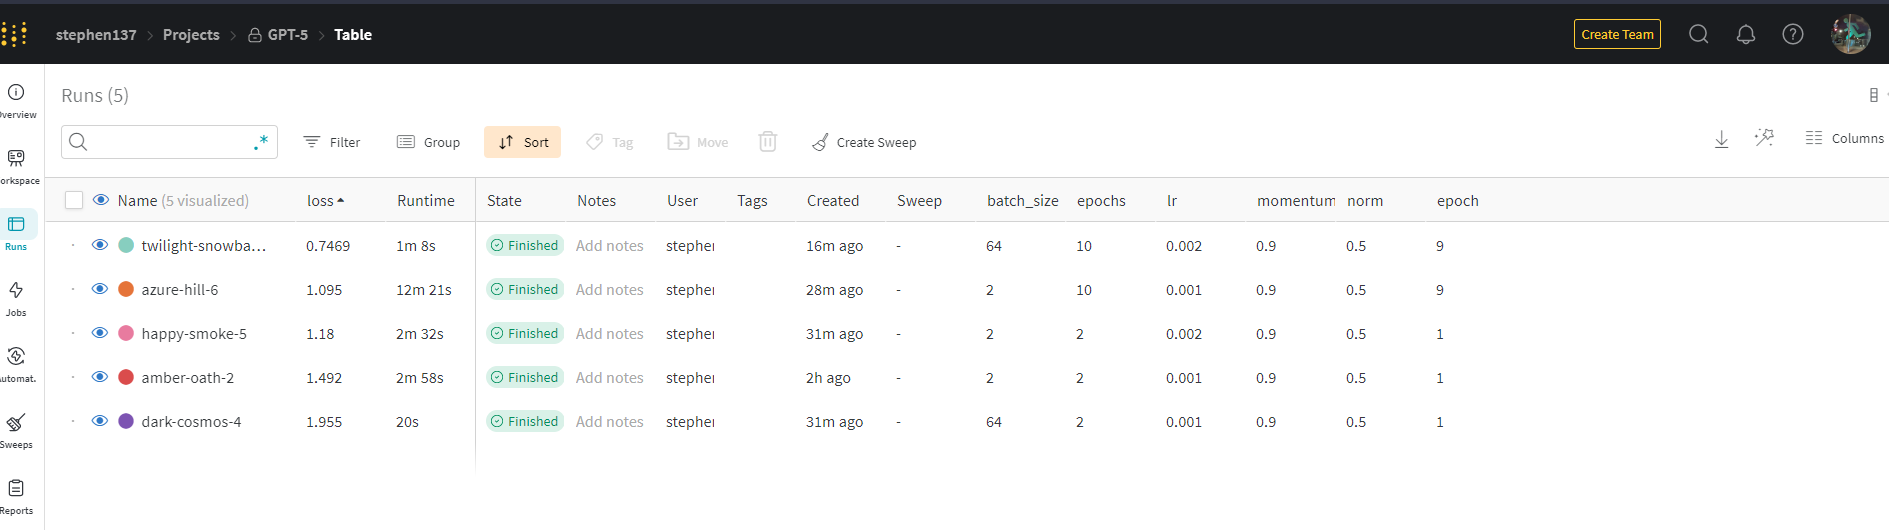
Let’s sort by loss in ascending order and pin the columsn loss and Runtime as this gives us a snapshot at a glance of these important metrics.
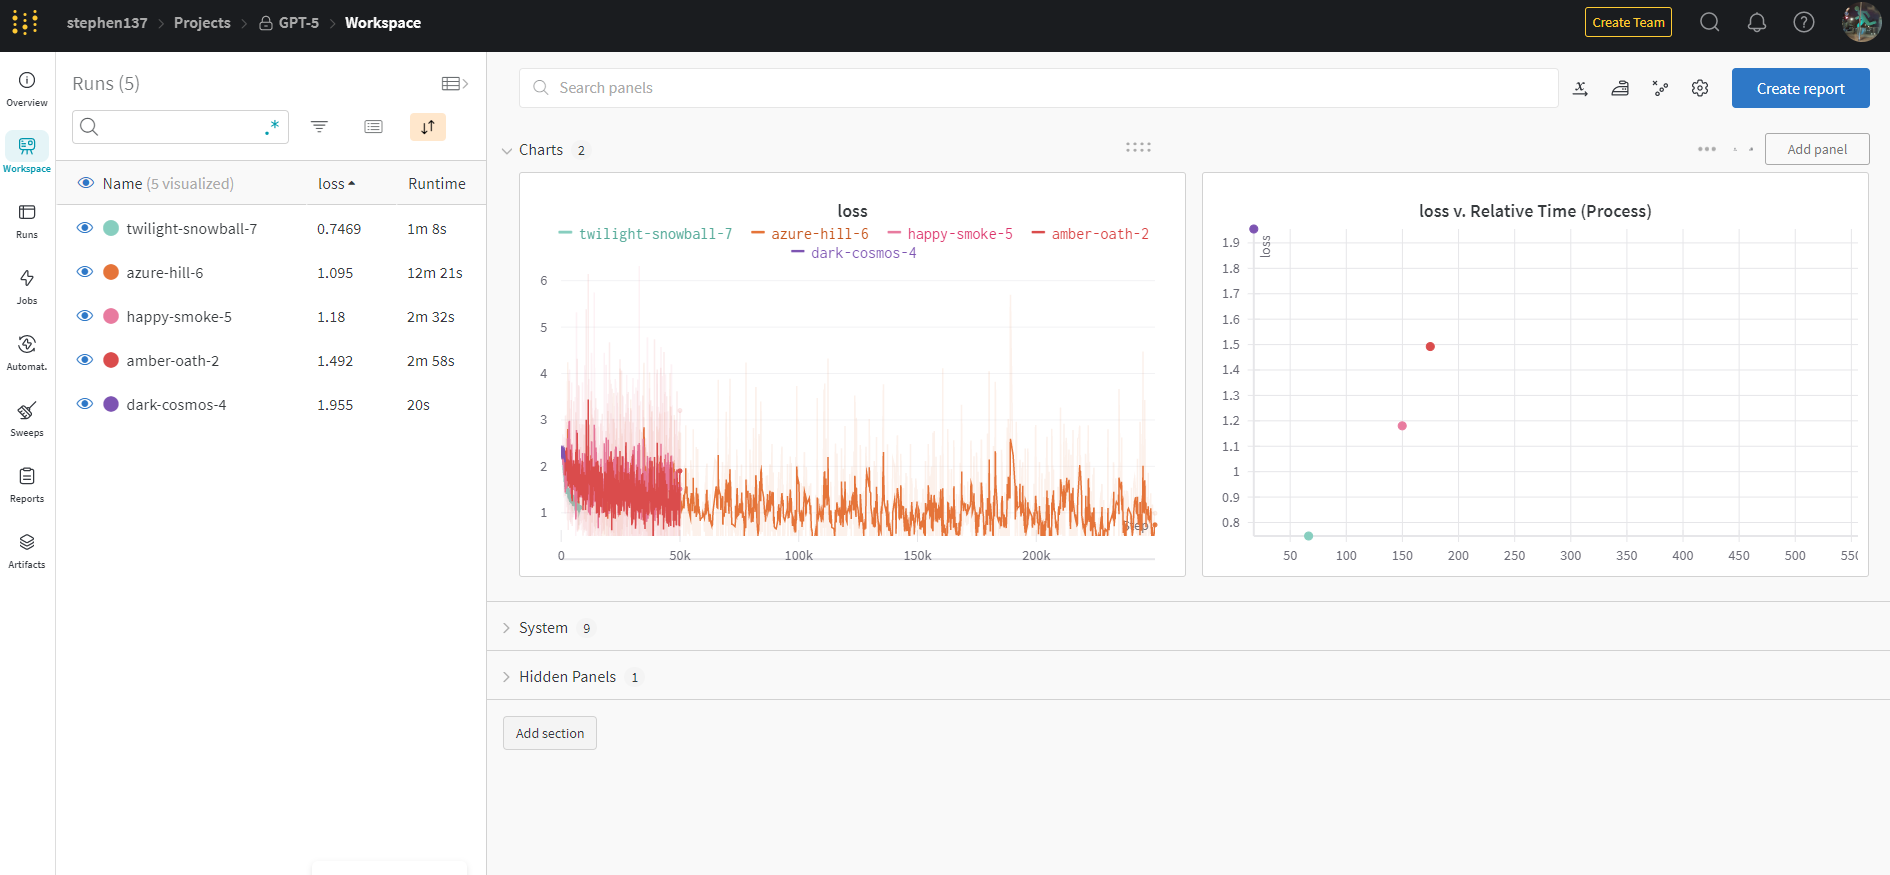
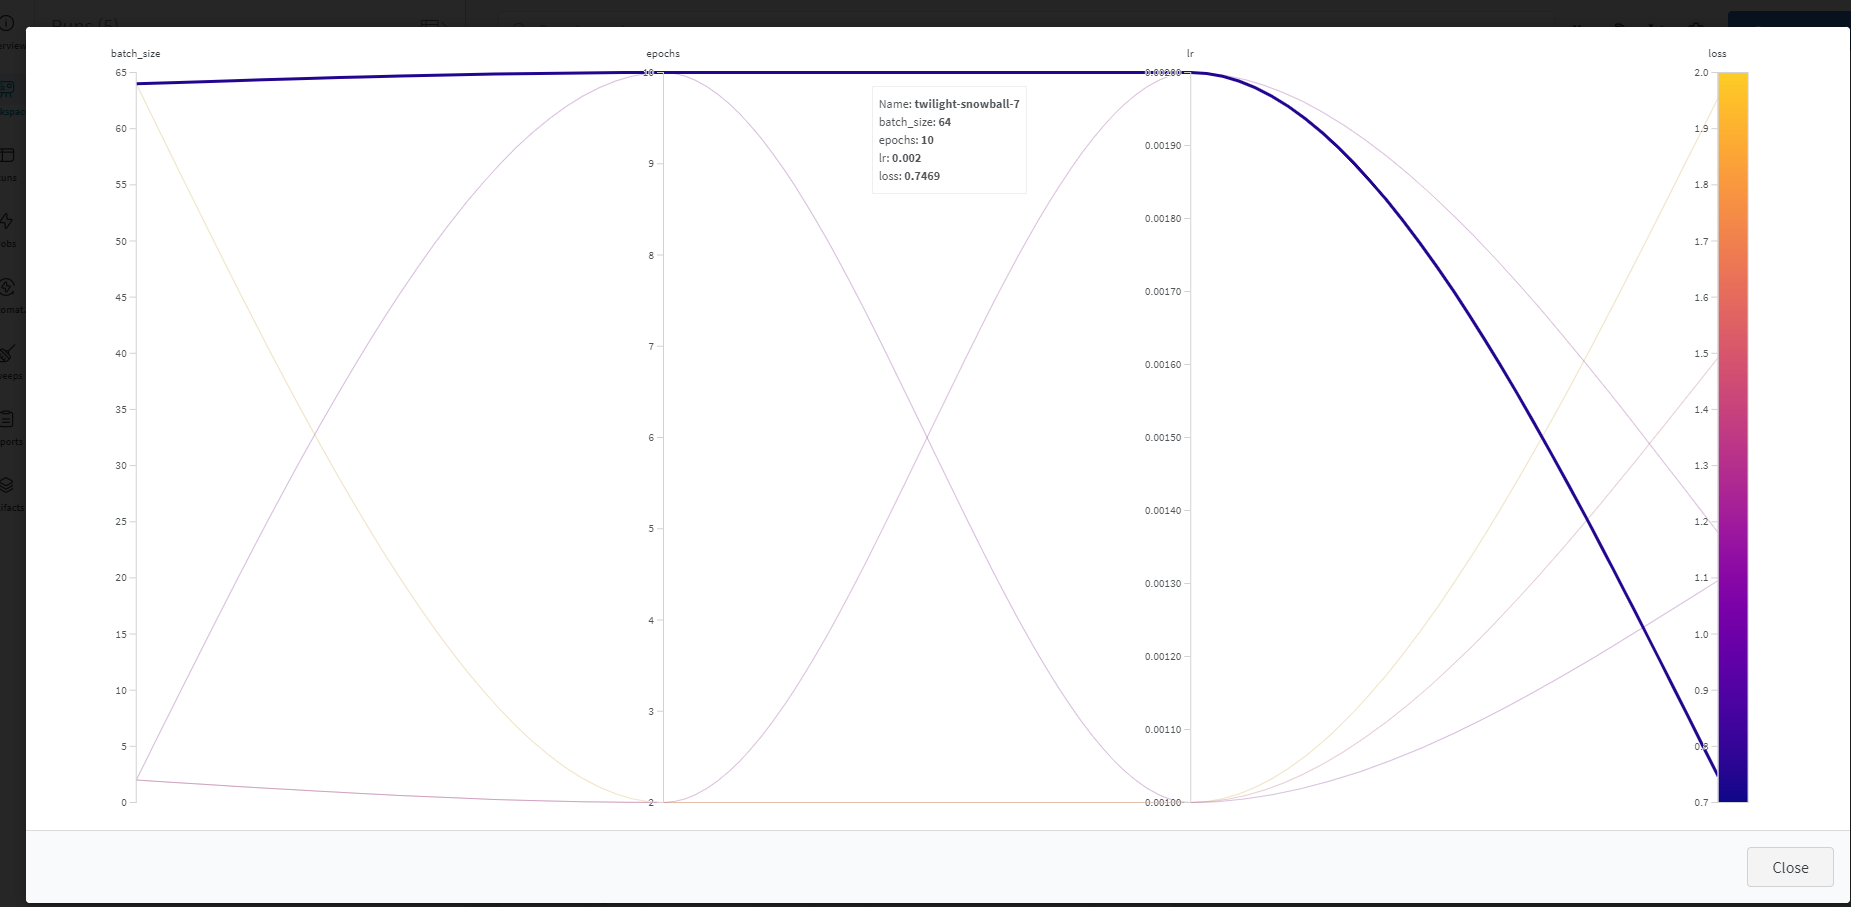
We can also visualize the results using the Charts feature. The scatterplot is a particularly good way of exploring the relationships between the various parameters:
5. Using W&B beyond experiment tracking
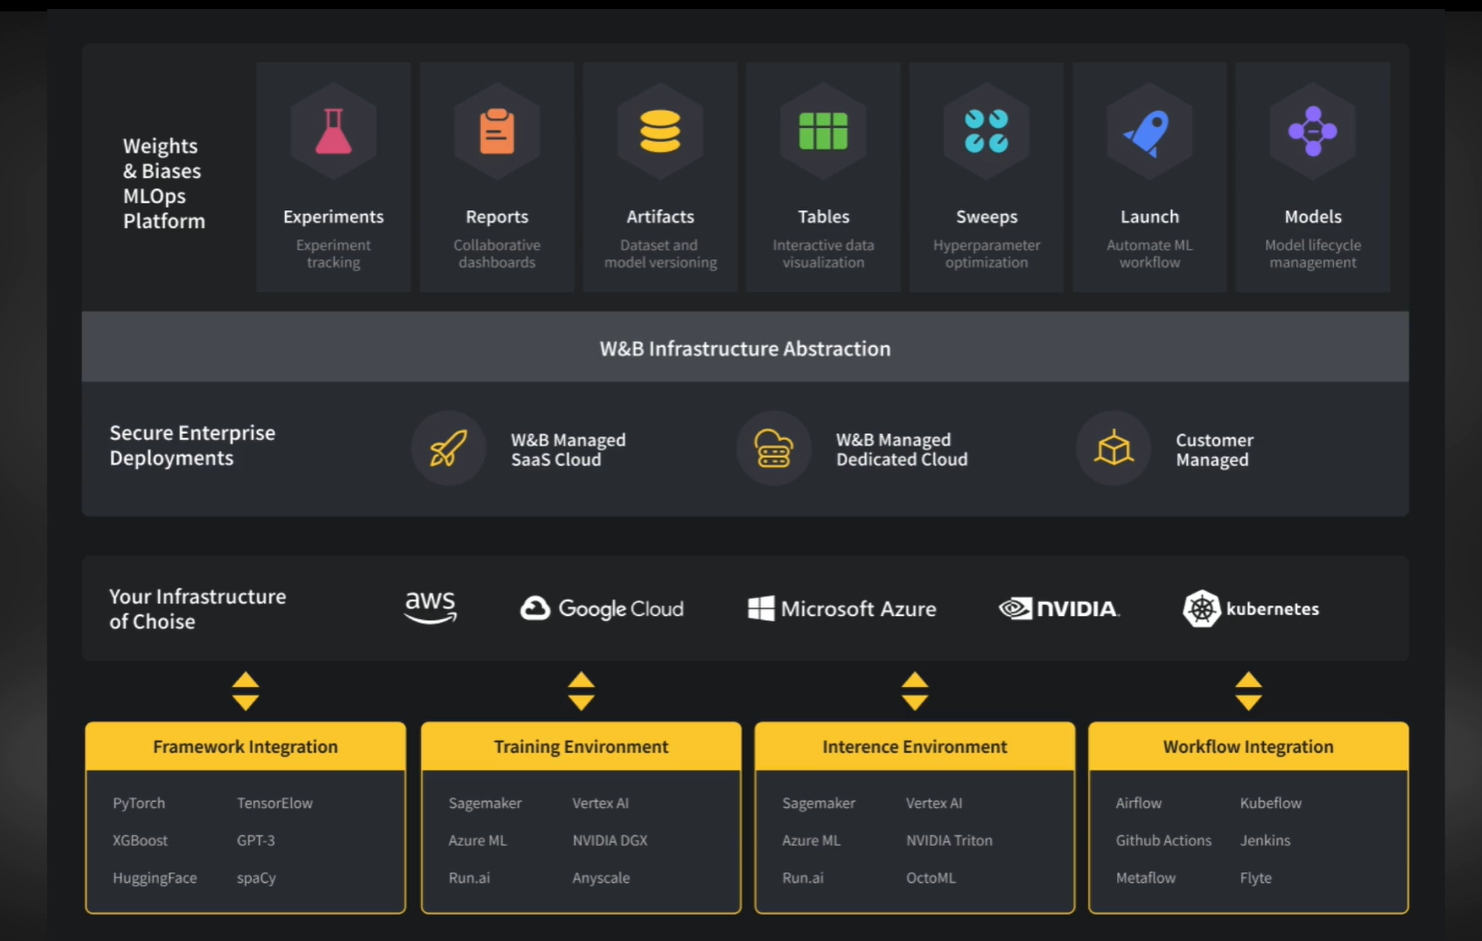
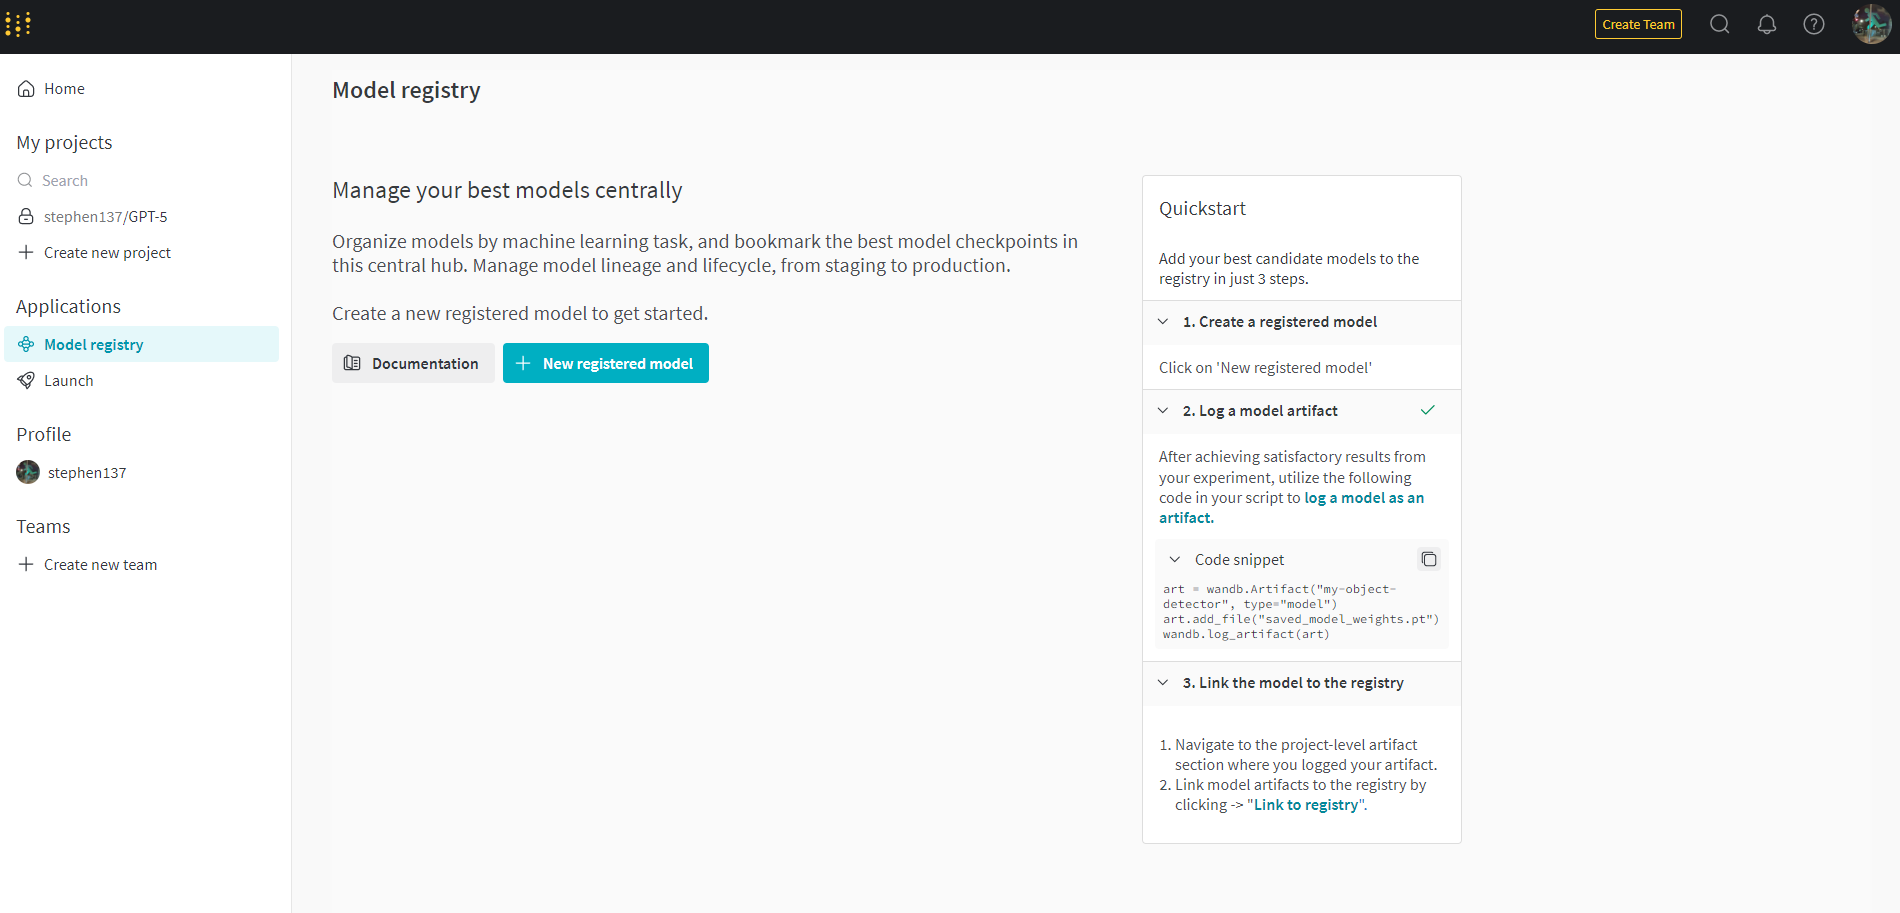
This section covers the advanced features of the Weights & Biases platform, including Sweeps for hyperparameter optimization, interactive Tables for data visualization and evaluation, Artifacts for data lineage tracking, and Models for storing and reproducing model development. The section also highlights Reports for sharing key metrics and analysis with stakeholders, and demonstrates how W&B integrates with popular cloud providers, hardware vendors, and ML frameworks.
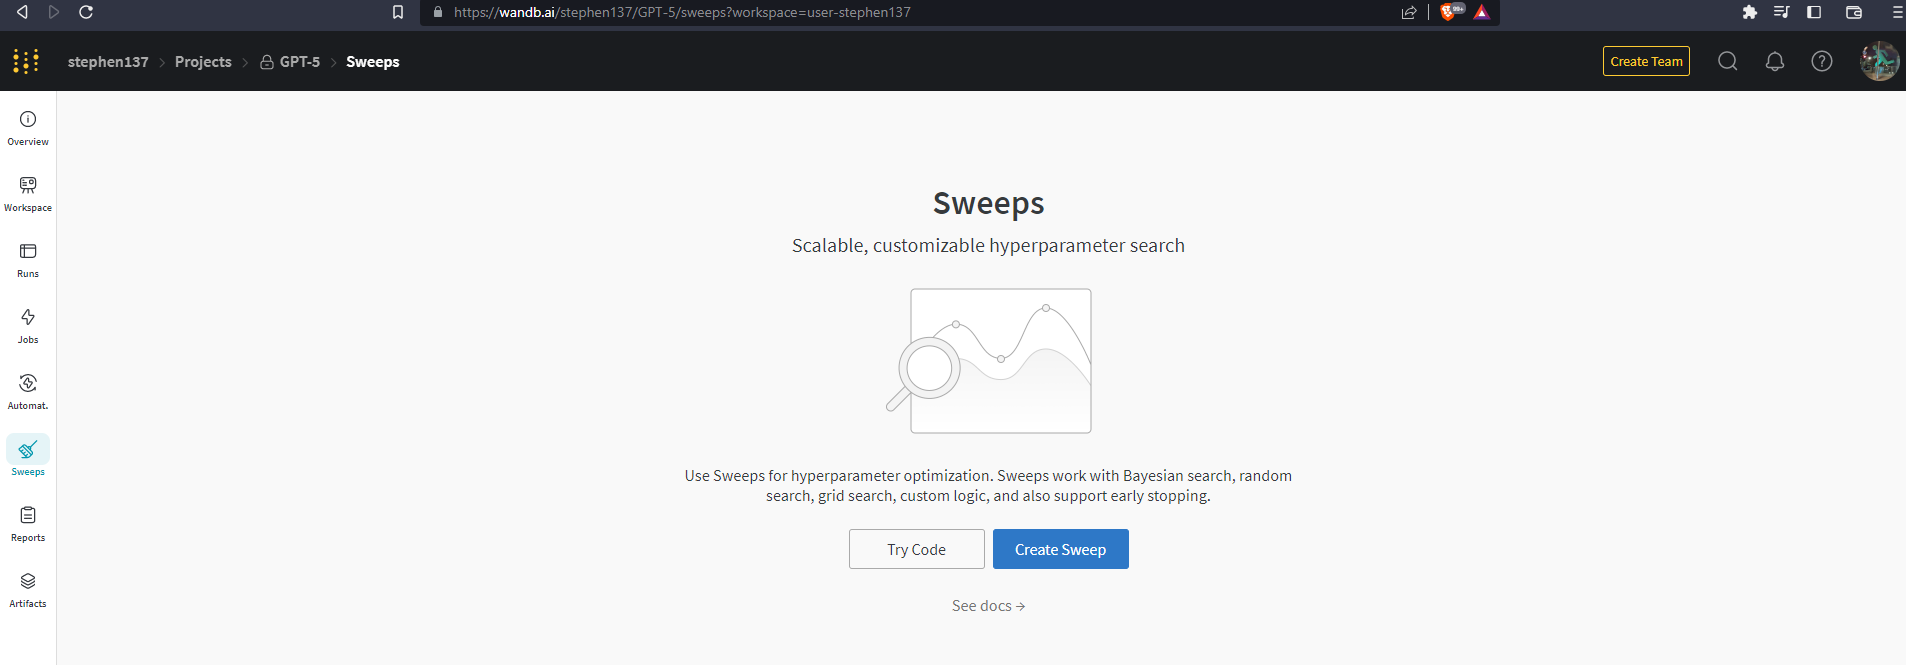
Once we have started tracking our experiments in a centralized location, the next step is often to optimize model performance. W&B offers the Sweep tool that provides lightweight automated hyperparameter optimization, in a fully scalable and customizable way.
5.1 Introduction to Hyperparameter Sweeps using W&B
Searching through high dimensional hyperparameter spaces to find the most performant model can get unwieldy very fast. Hyperparameter sweeps provide an organized and efficient way to conduct a battle royale of models and pick the most accurate model. They enable this by automatically searching through combinations of hyperparameter values (e.g. learning rate, batch size, number of hidden layers, optimizer type) to find the most optimal values.
Running a hyperparameter sweep with Weights & Biases is very easy. There are just 3 simple steps:
5.1.1 Define the sweep
We do this by creating a dictionary or a YAML file that specifies the parameters to search through, the search strategy, the optimization metric et all.
Fundamentally, a Sweep combines a strategy for trying out a bunch of hyperparameter values with the code that evalutes them. Whether that strategy is as simple as trying every option or as complex as BOHB, Weights & Biases Sweeps have you covered. You just need to define your strategy in the form of a configuration.
When you’re setting up a Sweep in a notebook like this, that config object is a nested dictionary. When you run a Sweep via the command line, the config object is a YAML file.
5.1.2 Pick a method
The first thing we need to define is the method for choosing new parameter values.
We provide the following search methods:
grid Search – Iterate over every combination of hyperparameter values. Very effective, but can be computationally costly
random Search – Select each new combination at random according to provided distributions. Surprisingly effective!
bayesian Search – Create a probabilistic model of metric score as a function of the hyperparameters, and choose parameters with high probability of improving the metric. Works well for small numbers of continuous parameters but scales poorly.
random Search
sweep_config = {
    'method': 'random'
    }
bayesian Search
For bayesian Sweeps, you also need to tell us a bit about your metric. We need to know its name, so we can find it in the model outputs and we need to know whether your goal is to minimize it (e.g. if it’s the squared error) or to maximize it (e.g. if it’s the accuracy).
metric = {
    'name': 'loss',
    'goal': 'minimize'
    }

sweep_config['metric'] = metric
If you’re not running a bayesian Sweep, you don’t have to, but it’s not a bad idea to include this in your sweep_config anyway, in case you change your mind later. It’s also good reproducibility practice to keep note of things like this, in case you, or someone else, come back to your Sweep in 6 months or 6 years and don’t know whether val_G_batch is supposed to be high or low.
5.1.3 Name the hyperparameters
Once you’ve picked a method to try out new values of the hyperparameters, you need to define what those parameters are.
Most of the time, this step is straightforward: you just give the parameter a name and specify a list of legal values of the parameter.
For example, when we choose the optimizer for our network, there’s only a finite number of options. Here we stick with the two most popular choices, adam and sgd. Even for hyperparameters that have potentially infinite options, it usually only makes sense to try out a few select values, as we do here with the hidden layer_size and dropout.
parameters_dict = {
    'optimizer': {
        'values': ['adam', 'sgd']
        },
    'fc_layer_size': {
        'values': [128, 256, 512]
        },
    'dropout': {
          'values': [0.3, 0.4, 0.5]
        },
    }

sweep_config['parameters'] = parameters_dict
It’s often the case that there are hyperparameters that we don’t want to vary in this Sweep, but which we still want to set in our sweep_config.
In that case, we just set the value directly:
parameters_dict.update({
    'epochs': {
        'value': 1}
    })
For a grid search, that’s all you ever need.
For a random search, all the values of a parameter are equally likely to be chosen on a given run.
If that just won’t do, you can instead specify a named distribution, plus its parameters, like the mean mu and standard deviation sigma of a normal distribution.
See more on how to set the distributions of your random variables here.
parameters_dict.update({
    'learning_rate': {
        # a flat distribution between 0 and 0.1
        'distribution': 'uniform',
        'min': 0,
        'max': 0.1
      },
    'batch_size': {
        # integers between 32 and 256
        # with evenly-distributed logarithms
        'distribution': 'q_log_uniform_values',
        'q': 8,
        'min': 32,
        'max': 256,
      }
    })
When we’re finished, sweep_config is a nested dictionary that specifies exactly which parameters we’re interested in trying and what method we’re going to use to try them.
import pprint

pprint.pprint(sweep_config)
But that’s not all of the configuration options!
For example, we also offer the option to early_terminate your runs with the HyperBand scheduling algorithm. See more here.
You can find a list of all configuration options here and a big collection of examples in YAML format here.
5.2 Initialize the sweep
Once you’ve defined the search strategy, it’s time to set up something to implement it.
The clockwork taskmaster in charge of our Sweep is known as the Sweep Controller. As each run completes, it will issue a new set of instructions describing a new run to execute. These instructions are picked up by agents who actually perform the runs.
In a typical Sweep, the Controller lives on our machine, while the agents who complete runs live on your machine(s).
This division of labor makes it super easy to scale up Sweeps by just adding more machines to run agents!
We can wind up a Sweep Controller by calling wandb.sweep with the appropriate sweep_config and project name.
This function returns a sweep_id that we will later user to assign agents to this Controller.
Side Note: on the command line, this function is replaced with
wandb sweep config.yamlLearn more about using Sweeps in the command line ➡
sweep_id = wandb.sweep(sweep_config, project="pytorch-sweeps-demo")5.3 Run the sweep agent
💻 Define Your Training Procedure
Before we can actually execute the sweep, we need to define the training procedure that uses those values.
In the functions below, we define a simple fully-connected neural network in PyTorch, and add the following wandb tools to log model metrics, visualize performance and output and track our experiments: * wandb.init() – Initialize a new W&B Run. Each Run is a single execution of the training function. * wandb.config – Save all your hyperparameters in a configuration object so they can be logged. Read more about how to use wandb.config here. * wandb.log() – log model behavior to W&B. Here, we just log the performance; see this Colab for all the other rich media that can be logged with wandb.log.
For more details on instrumenting W&B with PyTorch, see this Colab.
import torch
import torch.optim as optim
import torch.nn.functional as F
import torch.nn as nn
from torchvision import datasets, transforms

device = torch.device("cuda" if torch.cuda.is_available() else "cpu")

def train(config=None):
    # Initialize a new wandb run
    with wandb.init(config=config): # start training run
        # If called by wandb.agent, as below,
        # this config will be set by Sweep Controller
        config = wandb.config #

        loader = build_dataset(config.batch_size)
        network = build_network(config.fc_layer_size, config.dropout)
        optimizer = build_optimizer(network, config.optimizer, config.learning_rate)

        for epoch in range(config.epochs):
            avg_loss = train_epoch(network, loader, optimizer)
            wandb.log({"loss": avg_loss, "epoch": epoch})  # log metric and number epochs
The code below defines the four pieces of our training procedure: build_dataset, build_network, build_optimizer, and train_epoch.
All of these are a standard part of a basic PyTorch pipeline, and their implementation is unaffected by the use of W&B, so we won’t comment on them.
def build_dataset(batch_size):

    transform = transforms.Compose(
        [transforms.ToTensor(),
         transforms.Normalize((0.1307,), (0.3081,))])
    # download MNIST training dataset
    dataset = datasets.MNIST(".", train=True, download=True,
                             transform=transform)
    sub_dataset = torch.utils.data.Subset(
        dataset, indices=range(0, len(dataset), 5))
    loader = torch.utils.data.DataLoader(sub_dataset, batch_size=batch_size)

    return loader


def build_network(fc_layer_size, dropout):
    network = nn.Sequential(  # fully-connected, single hidden layer
        nn.Flatten(),
        nn.Linear(784, fc_layer_size), nn.ReLU(),
        nn.Dropout(dropout),
        nn.Linear(fc_layer_size, 10),
        nn.LogSoftmax(dim=1))

    return network.to(device)


def build_optimizer(network, optimizer, learning_rate):
    if optimizer == "sgd":
        optimizer = optim.SGD(network.parameters(),
                              lr=learning_rate, momentum=0.9)
    elif optimizer == "adam":
        optimizer = optim.Adam(network.parameters(),
                               lr=learning_rate)
    return optimizer


def train_epoch(network, loader, optimizer):
    cumu_loss = 0
    for _, (data, target) in enumerate(loader):
        data, target = data.to(device), target.to(device)
        optimizer.zero_grad()

        # ➡ Forward pass
        loss = F.nll_loss(network(data), target)
        cumu_loss += loss.item()

        # ⬅ Backward pass + weight update
        loss.backward()
        optimizer.step()

        wandb.log({"batch loss": loss.item()}) # log metrics

return cumu_loss / len(loader)Now, we’re ready to start sweeping! 🧹🧹🧹
Sweep Controllers, like the one we made by running wandb.sweep, sit waiting for someone to ask them for a config to try out.
That someone is an agent, and they are created with wandb.agent. To get going, the agent just needs to know 1. which Sweep it’s a part of (sweep_id) 2. which function it’s supposed to run (here, train) 3. (optionally) how many configs to ask the Controller for (count)
FYI, you can start multiple agents with the same sweep_id on different compute resources, and the Controller will ensure that they work together according to the strategy laid out in the sweep_config. This makes it trivially easy to scale your Sweeps across as many nodes as you can get ahold of!
Side Note: on the command line, this function is replaced with
wandb agent sweep_idLearn more about using Sweeps in the command line ➡
The cell below will launch an agent that runs train 5 times, usingly the randomly-generated hyperparameter values returned by the Sweep Controller. Execution takes under 5 minutes.
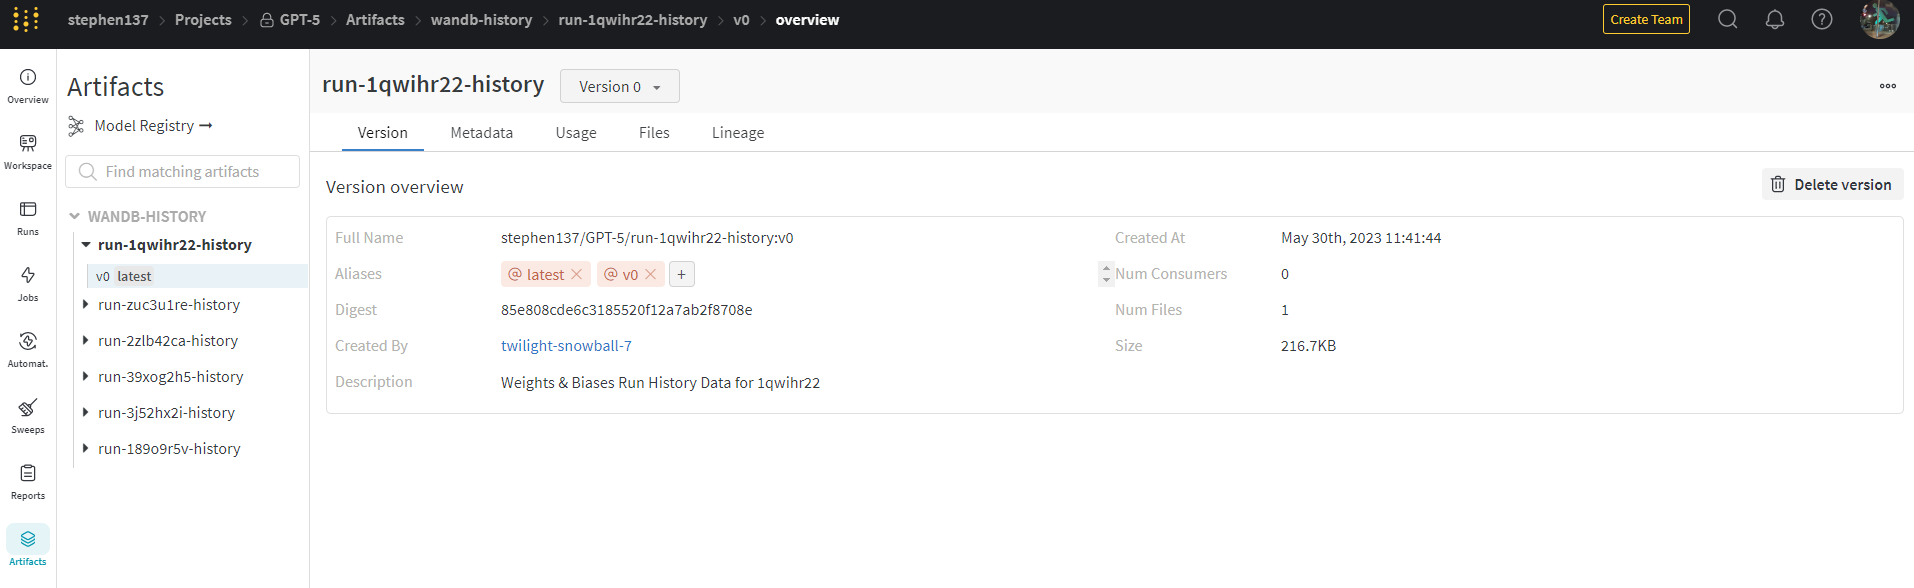
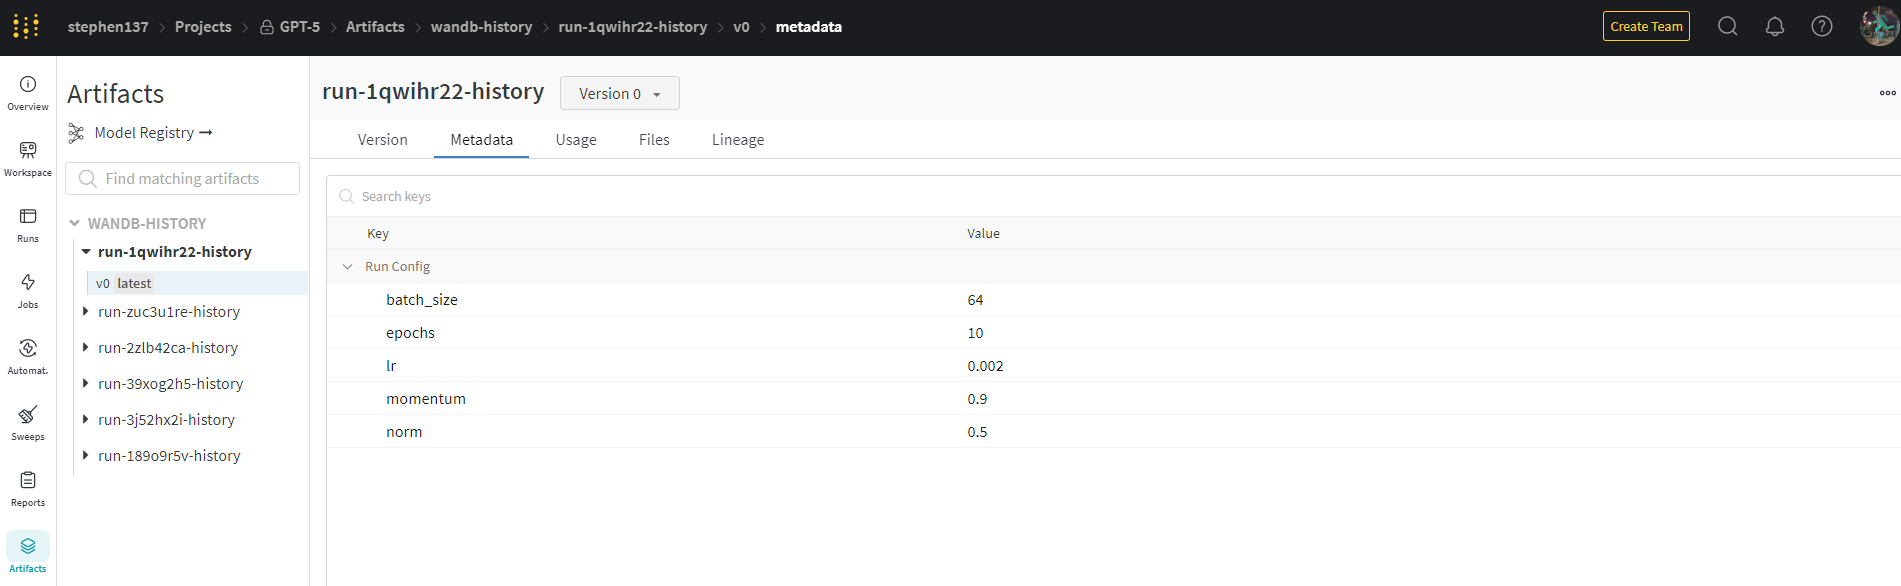
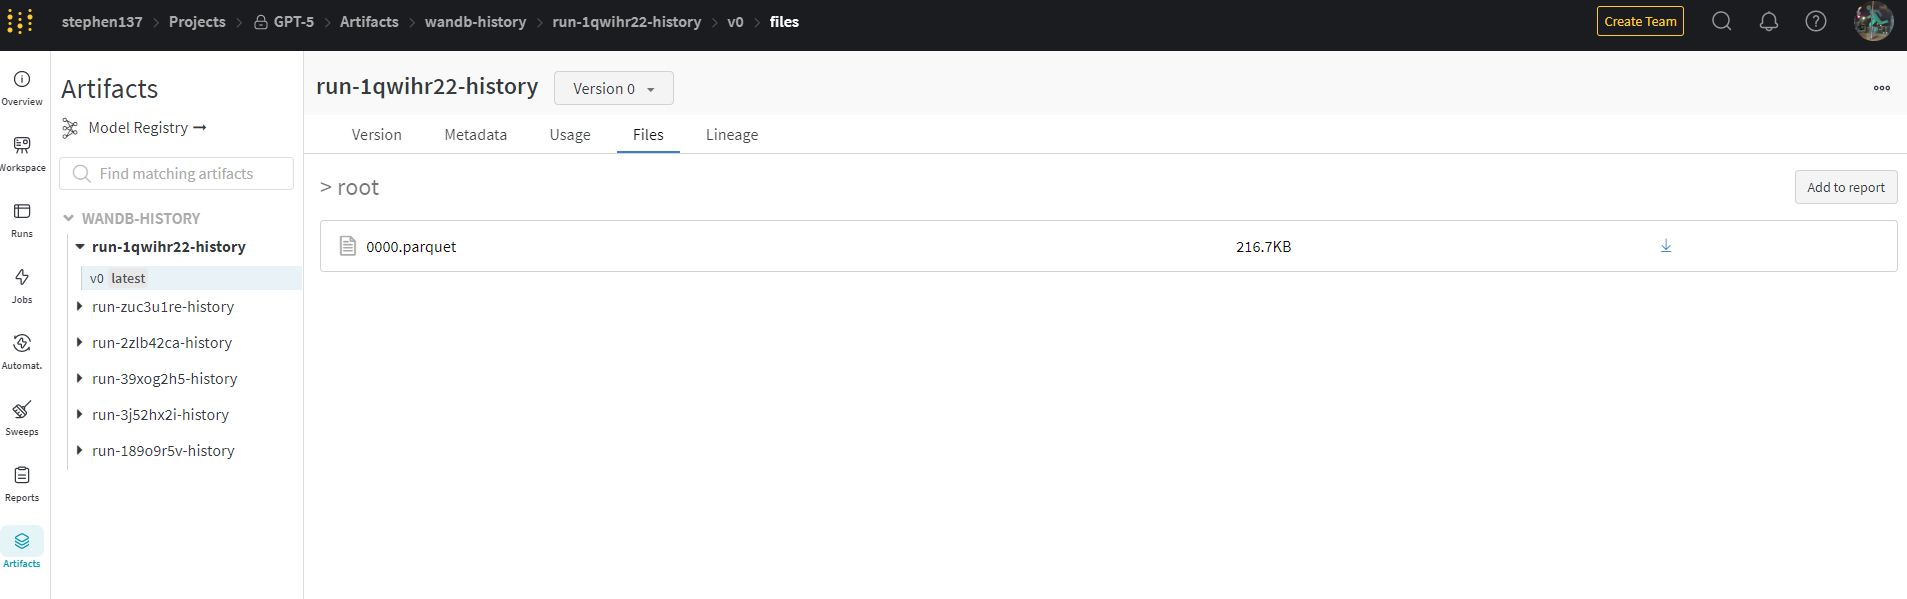
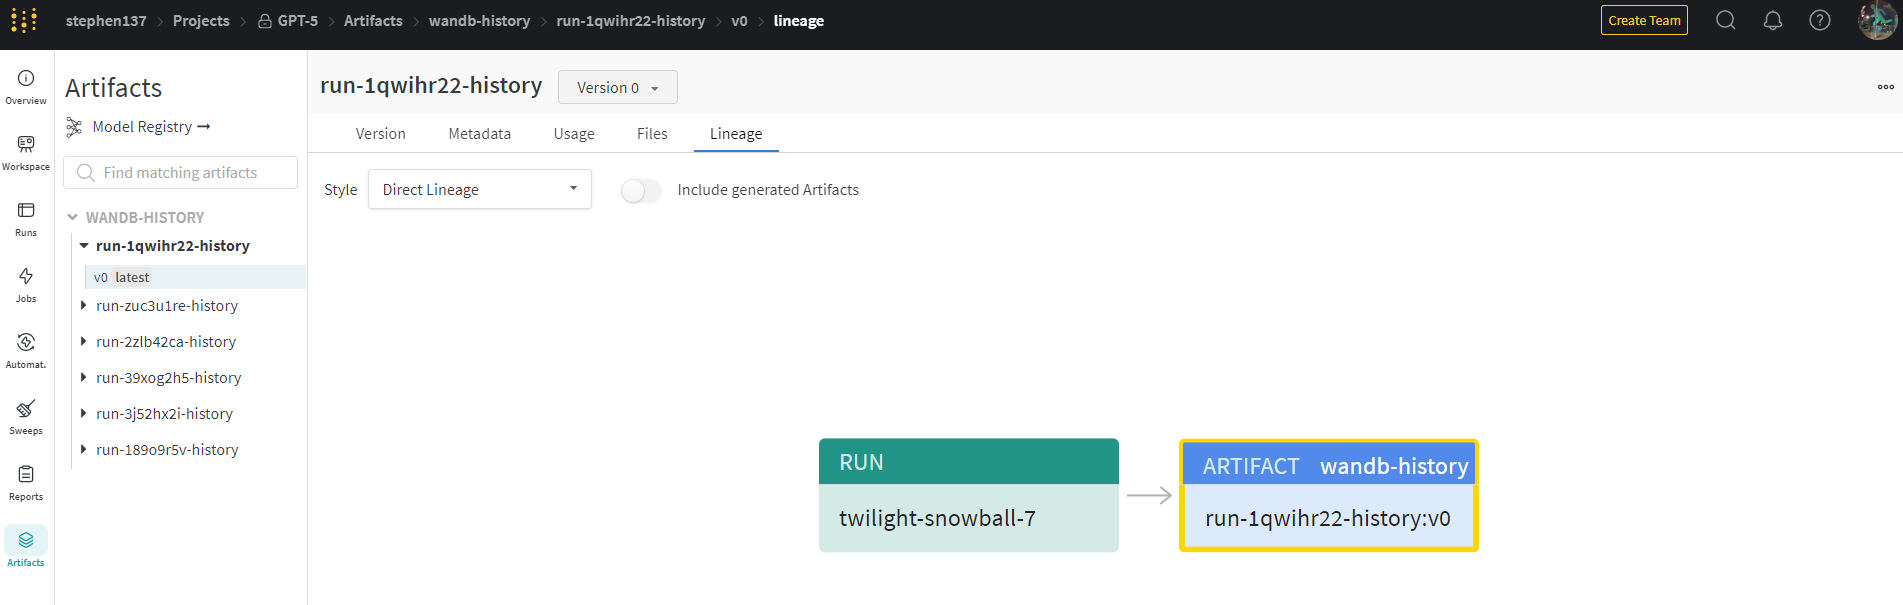
wandb.agent(sweep_id, train, count=5)5.4 Artifacts

5.5 Model registry
6. Recap
- Weights & Biases aim to solve the problem of tracking and organizing experiments in machine learning
- One of the many benefits of integrating Weights & Biases into your training script is that it creates shareable dashboards for tracking and visualizing experiments
- Installing the Weights and Biases Python client can be done from the command line using
pip install wandb - You can log metrics in your training script by passing metrics to
wandd.log()in a dictionary - You can interactively explore and customize the plots created in the Weights & Biases workspace
- Weights & Biases provides environment, user, machine, code state and command used to help with reproducibility
- In the Weights & Biases workspace, with the runs table, you can pin columns to the runs tab, interactively organize runs, and view logegd meetrics
- The main purpose of Weights & Biases
Sweepsis automated hyperparameter optimization - The Weights & Biases
Artifactsfeature allows you to version, organize, and compare data and model assets over time
- You can incorporate images, audio, and video into the Weights & Biases
Tablesfor analysis
7. Useful learning resources